Activate Developer Options on Galaxy S10 [+14 Best Tips and Tricks]
There’s a hidden menu on your phone and probably you don’t know about it yet. Once you get to perceive that, it can help you a lot in improving the overall experience on this smartphone. In this tutorial, we’ll help you enable the Developer Options on Samsung Galaxy S10 and S10 Plus and discuss the important tips and tricks that you can use to improve these smartphones in multiple manners.
Primarily used to access and enable the USB Debugging feature, the Developer Options menu has several features that can elevate different aspects of Android phones, if used appropriately. Whether you’re thinking to customize animations or DPI (size of the on-screen content) or want to inspect the running services. The Developer Options menu serves more options, that you may not have used or known yet.
Basically, the Developer Options is widely used by the apps/games developers to debug their developments. That helps them to build apps and games for Android firmware based mobile handsets. While everything that is given in this menu does not serve a purpose to any ordinary users like us, still there are enough features that we could use to enhance different aspects of our phone. That helps to improve productivity, customization and of course overall experience.
If you’re completely new to Android firmware or Developer Options, this guide should help you learn more than sufficient information about this menu. During this guide, we’ll to activate the Developer Options on Samsung Galaxy S10 and other variants and also discuss some important uses of this menu. Since this menu comes inbuilt on Android phones, while we enable and use it won’t void or cause any problem related to warranty or any other thing.
Must see:
While it doesn’t cause any problem with the warranty of the device, still using it unknowingly can impact the overall performance negatively, thus OEMs generally keep this menu hidden from the users. With a few cautions, you can easily exercise to get better results using this menu on your Samsung Galaxy S10. While you make any changes using this menu, we suggest you keep a track of it. If there’s anything that brings negative results, you would be able to undo it quickly.
Activating Developer Options menu on Samsung Galaxy S10 brings various ways that you can improve the overall experience. This is the most ethical way to improve performance and productivity that requires no third-party apps or utilities. Most of the time, Developer Options is used to activate the USB Debugging that allows users to connect their devices with ADB tool, PC Suits, and other various actions are applicable.
Whereas, this menu has plenty of other features that we can utilize for better fun and customization. Now, here we get started, follow the below instructions to Enable Developer Options on Samsung Galaxy S10, S10E and S10 Plus.
Activate Developer Options on Samsung Galaxy S10
- Open the ‘Settings’ menu on your phone.
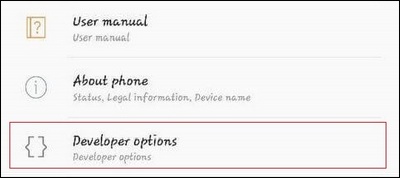
- Now, scroll down and tap on ‘About Phone’.
- Then, tap on ‘Software Information’.
- Now, tap 7 times on the Build Number.
- Right after that, you should see a message ‘Now you’re a developer’.
That’s how you can enable the Developer Options menu on most of the Samsung smartphones running on Android Pie firmware. Once this menu is activated, we can locate it right under the Settings menu.
If you ever wish to remove this menu from your phone, then you just need to clear cache of ‘Settings’ app within the Apps list. The following steps you need to follow to disable Developer Options menu on your phone:
- Open Settings.
- Open apps list.
- Now, tap on ‘Settings’.
- Then, tap on Storage.
- And tap on the CLEAR cache.
Right after this action, this menu will disappear from your phone. This information should be sufficient enough to turn on/off this menu on this phone. Now, we should move further and learn the best use of this menu.
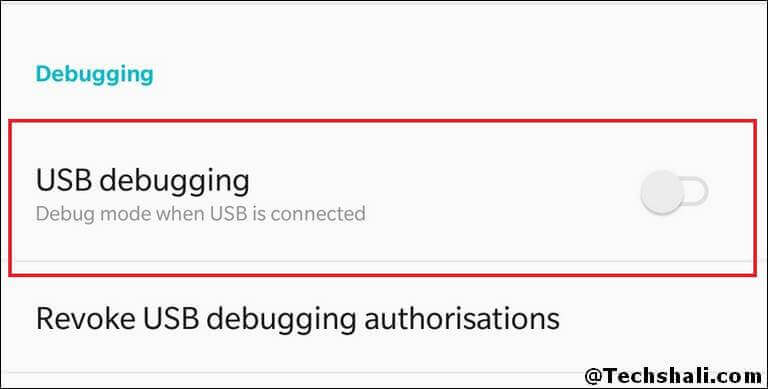
1# Enable USB Debugging
USB Debugging has many precise applications. Whether you’re connecting your phone with Samsung’s Smart Switch PC suite, Google’s ADB tool, or wanting to flash stock firmware using Odin tool, you would need to activate the USB Debugging on your phone first. Otherwise, these tools/applications won’t detect your phone.
Must see:
Use the following guidelines to enable this option on your phone:
- Tap on the Settings menu.
- Tap on Developer Options.
- Now, locate ‘USB Debugging’ and tap on it. That will enable this menu.
- Exit the menu.
Now, you should be able to connect your phone with different tools and manage this phone smartly. You can get started with the Odin tool for software update and upgrade purposes.
2# Customize Animations
Here’s how you can make your phone snappier a bit instantly. This menu allows users to customize animations that occur throughout the time we use our phones. We can control their extent and duration that directly shortens the action time and that obviously result in better response time. Which makes users feel that their phones are working a bit faster.
However, to maintain user experience, one should not disable these animations completely. That makes actions look weird. Use the following steps to customize animations on your Samsung Galaxy S10 using Developer Options:
- Open the Settings menu.
- Open the Developer Options.
- Now, look for “Windows Animation Scale”, “Transition Animation scale” and “Animator duration scale”.
- Tap on each entity and change the default value to 0.5X.
- Exit this menu.
Since animations are rendered for a short time, that improves both; performance and responsiveness. You can adjust above these settings based on your requirement or one that you figure as working best for you.
If you’re looking to speed up this phone, you must check the following resource:
3# Keep track of running services
There’s more that you can use to improve performance. There’s an option ‘Running services’ that allows users to get detailed insights about the running apps/services. Thus, you can smartly manage apps that consume most of the power resources and battery life. Either you can disable those apps or remove them.
Must see:
- How to improve battery life on Samsung Galaxy S10
- How to troubleshoot common problems on Samsung Galaxy S10
We already know that Samsung puts a lot of applications within the phone. Many of them remain unused all the time. Such apps are usually known as bloatware apps – unwanted apps. The most annoying thing is that many of these apps run in the background and consume both; Internet and battery life. And somewhat processing power.
That’s where you can use the Running Services menu to get detailed insights and disable/remove those apps:
- Open the Settings menu.
- Now, tap on the Developer Options.
- Then, tap on ‘Running services’.
- Now locate the app that might cause the problem and stop it to see if that works.
Disabling unused/bloatware apps can help you a lot in achieving better performance. While working with Note 9, we find that there were 100+ bloatware apps and many of them were running in the background.
After we disabled them, around 1.5 GB RAM was released and directly supports better performance. You can learn more here:
4# Enable OEM Unlock
Before you unlock your Samsung Galaxy S10 smartphone (locked variants), you would need to check this option within the Developer Options. Like most of the smartphone manufacturing companies, Samsung puts a protection layer that resists external changes.
Once you enable this option, you would be able to unlock your phone, install custom firmware, recovery and achieve root access.
The following steps will help enable you OEM Unlock on your phone:
- Open the Settings on your phone.
- Then, Developer Options.
- Under this menu, tap on OEM unlock.
Now, you can move forward to tweaking your phone through unofficial ways (recommended for advanced users).
5# Select USB Configuration
Another interesting thing you could do using the Developer Options on your Samsung Galaxy S10. While connecting the Android phone to laptop/desktop, you should have observed that it prompts to choose between different USB configuration options. Whether you want to transfer files, media, camera or similar options are displayed.
Using the Developer Options, you can set a default USB Configuration. Thus, you won’t have to select every time you connect your phone to the computer. That saves both; time and effort. Here’s how you can do that your phone:
- Open the Settings menu on your phone.
- Now, tap on Developer Options.
- Under this menu, tap on ‘Set USB Configuration’.
- And select the desired default configuration.
This should make file transfer or other tasks easier. In my case, I’ve selected ‘File transfer’ as a default option.
6# Limit background process
If you’re running out of battery or in a situation where you want that only certain apps should run in the background (it has no relationship with battery saver mode, they both work in different ways), then you can use the Developer Options to set a limit on number of apps that could run in the background.
Must see:
You can implement this setting when you’re running short in battery life. This can help you get both; performance and better battery life. However, you should know that it will close other apps exceeding the set number. That can disturb the usual working with apps. Therefore, you should apply this action only in cases where you need to get the most out of the battery life.
- Open the Settings menu.
- Tap on Developer Options.
- Now, look for “Limit Background process” and tap on it.
- Then, choose a limit that you want to set.
**Don’t go below 2 background processes. That can hamper the user experience extensively.
7# Enable Force GPU Rendering
Do you know that current smartphones are no less as compared to computers? Not they are powerful as laptops, the internal functions are quite similar. For processing visuals and numeric calculations; mobile phone uses both, processors and a graphical processing unit. The Developer Options menu allows users to set GPU units for rendering needs.
This action will free some amount of processing power (CPU) that is being used for rendering purposes. Although it doesn’t bring measurable improvements, still you can expect your phone’s UI becomes a bit smoother. Here’s how you can implement this setting right away:
- Open the Developer Options on your phone.
- Under the menu, look for Force GPU Rendering.
- And enable this option.
Thereafter, almost every rendering request will be handled by the GPU unit. So, more CPU resources will be available for real-time processing.
8# Fake your location
You can fool friends, family members, and apps by putting a fake location. You can set any location that you want around the world. The Developer Options menu makes this possible. On Google Playstore, there plenty of applications that use this feature to fake location on Android phones.
Although there are tons of options out there, we suggest you use the Fake GPS Location Spoofer app, it’s quite simple yet effective. After you download and install that application on your phone, to make it work, you need to use the Developer Option and select the mock location app. Don’t worry, just apply the following steps:
- Open the Settings menu.
- Then, tap on Developer Options.
- Now, tap on the ‘Select mock location app’.
- Then, select the GPS Location Spoofer application from the list or one that you’ve downloaded.
Now, open that fake location app and fool friends easily. In this way, you can play games like Pokemon Go or any other that uses your location. Isn’t that great?
9# Improve gaming performance using Force 4x MSAA
If you’re anything like me then you must be good at gaming. For people who are an addict to gaming are more precise about performance and visuals. There’s an option ‘Force 4x MSAA’ within the Developer Options menu that can improve the overall gaming experience a bit on Samsung Galaxy S10.
Must see:
The terms MSAA stands for multi-sample anti-aliasing, and once we activate the Force 4x MSAA option, it forces GPU chip to render visuals at the highest possible rate in games and apps that support OpenGL 2.0. That brings some improvements in game-play and visuals.
However, there’s one thing that you shouldn’t miss. While this option is activated, the battery of the phone is drained at higher rates. Soon, your phone will run out of battery. Therefore, you must use this feature carefully.
The following steps are set to help you enabled the Force 4X MSAA feature on your Samsung Galaxy S10 using the Developer Options:
- Open Settings on your phone.
- Tap on Developer Options.
- Now, look for “Force 4x MSAA” and enable it.
- Exit this menu and reboot your phone.
Now, open your favorite game and observe it thoroughly. You should observe improvements, that can be in terms of performance and visuals.
Have fun!
10# Select Bluetooth Audio Codecs
Music lovers, it is just for you. Android Oreo and above brings some extended Bluetooth audio options to better output and customized quality. While the default Bluetooth Audio quality directly depends upon the Bluetooth headsets or device you’re using. Further, we can elevate that quality through select HD Audio codecs.
Again, this setting is available within the Developer Options. While testing this feature on OnePlus 5, we found that it works very well. We chose Qualcomm aptX Hd (the default was SBC). You can measure improvement using the headphones.
Use the following instructions to use this feature on your phone:
- Open the Settings menu.
- Tap on Developer Options.
- Look for ‘Bluetooth Audio Codec’ and select the desired codec.
- Exit the menu.
Remember that it works on Bluetooth headsets only. And it may not work with all headsets. Just give it a try and cross your fingers.
11# Customize DPI to improve readability
Do you find yourself struggling when it comes to reading texts and icons? If the answer is yes, then apply this action right away on your phone. The term DPI stands for Dot Per Inch, is related to the rendering process (not directly). This aspect controls the size of the On-screen content like text and icons.
Through it, we can easily set the desired text and icon size. That makes easier to read the text and locate icons. And it happens without affecting the screen resolution. So, you don’t have to sacrifice with screen resolution. And to render a little bigger object, the least amount of processing /rendering power is used.
Thus, it somewhat improves performance. And makes the devices work smoother, as far as we have observed the result. We hope the same for you:
- Open the Developer Options.
- Now, look for ‘minimum width’ or ‘smallest width’ option.
- Change the default value to 400 or something even small.
- Exit this page.
Reboot your phone right after you perform this action so changes can be stored. It improves both; readability and smoothness.
12# Switch to OpenGL Skia renderer
There’s a lot of benefits of using a phone that runs on Android Oreo and Pie firmware. The Android Oreo and above allow users to switch between the default OpenGL and OpenGL Skia renderer. Since this option has been implemented, it has been observed that OpenGL Skia works a little faster and renders better visuals.
This renderer works on the same libraries that Google Chrome and many other applications use it. Therefore, you can expect good results using renderer while ditching the default one. You can expect results in long terms. You cannot measure that results instantly, you’ll feel that over time.
- Just open the Settings.
- Tap on Developer Options.
- Now, look for ‘Set GPU Renderer’
- Select Open GL (Skia).
Remember, this setting may be removed each time you reboot your phone. Basically, a renderer is selected during the boot-up time. You cannot make it default permanently. You would need to reboot each time you reboot. Or just try yourself whether it selects the default renderer or OpenGL (Skia) stays.
13# Enable Force activities to be re-sizable
We hope that you would be enjoying the screen-split feature on your phone. This feature entirely depends upon the applications. If any of your application doesn’t support screen split facility, you won’t be able to work on it, under multi-tasking mode.
There’s nothing to worry a lot. We can force that application to work in Screen Split mode even if that doesn’t support this ability. For that purpose, you just need to activate the ‘Force activities to be re-sizable’ option within the Developer Options on your Samsung Galaxy S10 smartphone. Here’s how you can do it on your phone:
- Tap on Developer Options.
- Scroll down to the bottom of the screen to locate; Force activities to be re-sizable.
- Enable this option.
- Exit the menu.
Thereafter, all the applications that do not support multi-task abilities would adopt the Screen Split ability.
14# Enable Don’t Keep Activities
It is rarely used by mobile users. Once activated, each time you close or switch applications, it removes all run-time and temporary files. There’s no doubt that it keeps our smartphone running fast and smooth all the time, however, it there is will be lots of chances that users would lose app data and game progress. It closes applications and clears memory thoroughly.
This can help you in times where you would need to save the battery power. Otherwise, we don’t recommend you to use this feature.
- Tap on Developer Options.
- Scroll down and locate ‘Don’t Keep Activities’.
- Enable this option.
- Exit the menu.
That should begin the cleaning process on your phone. Each time you close or switch to other applications, it will vanish, everything from the run-time memory related to that app.
Which is your favorite one?
That ends our list of best Developer Options tips and tricks for Samsung Galaxy S10 and other variants. We hope that our readers would find this tutorial helpful.
Don’t forget to share your favorite one with us. And if you have something better to share with us, do let us know through the comment section below. We would love to hear from you. Stay connected with us for more useful tutorials and such lists.