How to take Screenshot on Galaxy S10, S10E and S10+
Here’s a quick tutorial that helps to take a screenshot on Samsung Galaxy S10, S10E and S10+ smartphones. Out of the box, these smartphones have been powered with Android Pie firmware polished with One UI skin. That brings many new features whereas some tasks remain the same. During this tutorial, we’ll learn different methods to take screenshots on these Samsung Galaxy series smartphones.
In order to take screenshots on these power-packed smartphones, there are different methods; we can use the hardware keys, palm swipe feature, use Bixby button or Google Assistant and other are many other apps specifically built for this purpose. Taking screenshots is something that you can’t miss to learn on your phone. Through ability, you can easily capture some important screens.
These screens can be web pages, errors or bugs popping out, or something that you want to capture and share with someone else right away. Just like any other Android phone, this facility is available in these Galaxy smartphones, with many enhancements. While this facility comes inbuilt, there are many third-party applications like Screenshot Easy, that really brings the facility to any Android phone.
If you’re too frequent in taking screenshots on your Samsung Galaxy S10, then are tons of third-party party apps that one use. One of them is Screenshot Easy. This app brings multiple facilities to take screenshots on Android smartphones with multiple extra features that get help to get more out of this ability. The most noteworthy fact is that this app is available on Google Play store at zero cost. It adds various ways to record screenshots and manage them properly.
The capture screenshots are stored within the internal memory, here’s the path; Internal Memory/Pictures/Screenshots. This is the default path for the screenshots users capture. We cannot change this default path. Being flagship smartphones from Samsung, these smartphones have been blessed with many useful features. Palm Swipe feature is among them. That helps Samsung Galaxy S10 users to take screenshots just swiping their palm over the display screen.
Must see:
If you’re using Samsung’s smartphone for the very first time, this guide shall help you learn this screenshot taking ability. There are different situations where one can use this ability to take screenshots on Samsung Galaxy S10 and other variants. We will detail all possible ways that we can use to capture screens on these smartphones. Don’t forget to share your favorite one with us in the comment section. We would love to hear from you and make this tutorial even better.
1. Take a screenshot on Samsung Galaxy S10 using hardware keys
- Open the app or website or screen that you want to capture.
- When you’re ready, press and hold Power and Volume Down buttons simultaneously.
- Release these buttons once you hear the shutter sound (doesn’t appear in silent mode).
- Congrats you’ve taken your first screenshot on Samsung Galaxy S10, keep on going!
Just right after you hear the shutter sound, a strip will appear that serves further options to edit or share that screenshot. Additionally, you can access the screenshot or these options through Notification panel.

Still, this method is the most loved one. Users just need to press these two buttons simultaneously to take a screenshot on their smartphones. This method remains common among all Samsung smartphones that have been released in recent years, especially ones that don’t have the home button.
Must see:
The screenshots are saved in the phone’s internal memory in this path; Internal memory/Pictures/Screenshots. You can access these screenshots on your phone through the Gallery application or file manager. There’s one more thing that you should know. The resolution of screenshots depends up on phone’s screen resolution.
Higher the resolution, the quality would be greater, however, that increases the overall size of the images. On this smartphone, you can manage resolution, thereby, you get the screenshots balanced with resolution and size. Now, we shall proceed further to explore more ways screenshot Samsung Galaxy S10, S10E, and S10+ smartphone.
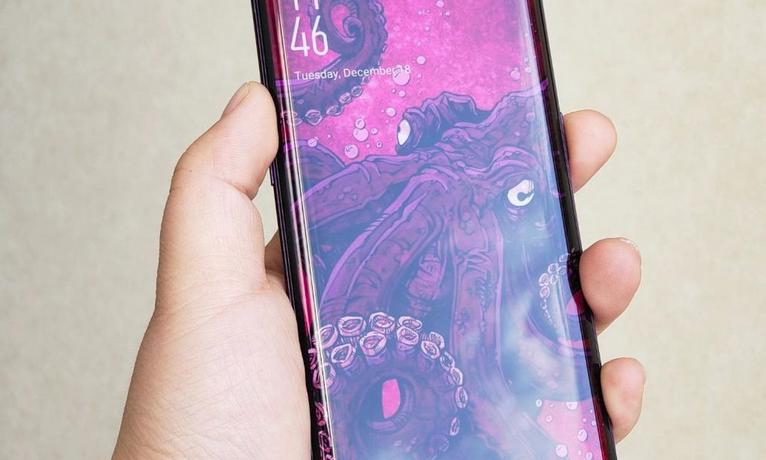
2. Use your palm to capture the screen
Palm gesture feature was first added on Samsung Galaxy
By default, this option comes enabled on Galaxy smartphones. So, you just try to swipe your palm over the display screen slightly touching it. That’s it, you should find that screenshot has been captured. If nothing happens, then you would need to enable this gesture option on your phone. Use the following instructions to activate Palm swipe to capture gesture on your phone:
1. Open Settings on your phone.
2. Then, tap on ‘Advanced features‘.
3. Tap on ‘Motion and gestures entity’.
4. Now, enable the ‘Palm swipe to capture‘ feature from the list.
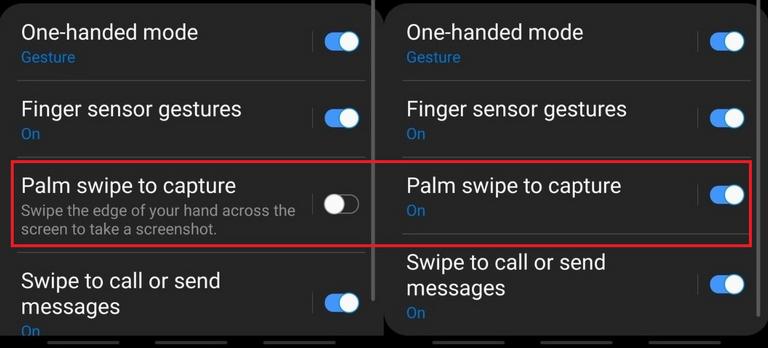
5. Now, when you’re ready, swipe your palm over the screen to capture that screen.
That’s how the
3. Ask Bixby/Google Assistant to take a screenshot on Samsung Galaxy S10
Bixby isn’t that most anticipated feature on the Samsung Galaxy S10 smartphones, and so far, it has struggled so far to get attention from users. If you’re one of those who
Bixby is quite similar to Google Assistant. To work with you, users just need to press and hold the Bixby button. Thereafter, they ask Bixby to perform an action. Here’s how one can use this not-so-popular option to click a screenshot on Samsung Galaxy S10 smartphone.
- Get to the app or page or screen that you want to save.
- Now, press and hold the Bixby button.
- And say ‘take a screenshot’.
That is just enough to perform this action. Alternatively, we can use Google Assistant for this purpose as well. Make sure that you’ve Google Assistant app installed on your phone or download it from Google Play.
After that, the following instructions should help you get started with Google Assistant:
- Open the App or page that you want to capture.
- Next, press and hold the Home Key.
- Once the Google Assistant appears, say ‘take a screenshot’.
- And see, your screen has been captured without using any hardware key.
Isn’t that good idea to use Bixby or Google Assistant apps for such purposes. There’s a lot more we can do these two applications, especially with Google Assistant application.
Moving next, we are going to discuss another important way to take screenshots on Samsung Galaxy S10 smartphones.
Must see:
4. Take scrolling screenshots on Samsung Galaxy S10
Surely, you would be interested in knowing what exactly scrolling screenshots means. Basically, this ability allows users to capture screens where content lengths vertically like webpages, ebooks, and content within applications.
On Samsung Galaxy S10, this ability comes inbuilt and can it quite easier to use it. There are no special steps for this purpose. You can follow any of the above methods to capture normal screenshots and once the Screenshot Controls appear, there you choose the ‘Scrolling screenshot’ option to continue the screenshot taking process.
Here’s how you can easily take such screenshots on your phone:
1. Get to the page or app or screen that you want save.
2. When you’re ready, press and hold Power and Volume down buttons at the same time.
3. Once Screenshot Controls menu appears, tap on scrolling screenshot option, double arrow.

4. Touch the screen to end the screenshot process.
5. Scrolling screenshot has been captured and you can take further actions on it.
Apart from these methods, there’s one more way. If you frequently indulge with taking screenshots on your phone, then you can use an application called — Screenshot Easy. This app enables you to get most of this ability and it is completely free to use. If you’re not satisfied with the above methods and looking for an alternative, we suggest you use this app.
Wrap-up!
Here are tutorial ends that incorporate multiple methods that take screenshots on Samsung Galaxy S10 and other variants. We hope that our readers would find this tutorial helpful. Don’t forget to share your favorite method with us in the comment section below. If you have any other method, do let us know. We will use your inputs to improve our tutorials and make them even better.


Hi, is the screenshot default folder different on earlier Samsung models, I’ve seen lots of people complaing of not being able to excluide them from Backup in Google Photos because the are saved to DCIM/Screenshots
Hi Peter,
Basically, DCIM is used for pictures taken through the camera. So, phone might use that folder to store screenshots as well.