How to Enable Developer Options on Pixel 3 and 3 XL [+Useful Tips]
Recently launched, Google Pixel 3 and 3 XL are setting their space within the smartphone market. And we expect them to do good like the previous models. Most importantly, this smartphone runs on the Android Pie operating system, the latest one in the firmware lineup. That ensures that you have access to the latest features and applications. In this tutorial, we’ll help you to enable Developer Options on Google Pixel 3 and 3 XL smartphones. This menu helps to access some core settings that can improve performance and productivity.
Most of the time, users seek this menu to enable USB debugging and control animations. The Developer Options is present on almost all smartphones. However, for some reasons, OEMs keep this menu hidden from users. This menu has been built for development purposes. This allows Android developers to test and debug their developments and bring us new applications. That isn’t so hard to activate this menu on Android phones. Most importantly, while we enable and access this mode on your phone, it has nothing to do with the warranty and other aspects of the phone.
That means you can access this menu anytime you want without worrying about anything else. Though it won’t impact your phone negatively, you still shouldn’t use this menu carelessly. There are lots of benefits from this menu. Once you enable the Developer Options on your Pixel 3 and 3 XL smartphone, you would be able to customize animations, background applications, select Bluetooth audio codecs, limit background services and so on. Certainly, through these settings, we can easily manage to make our phone perform better in multiple aspects.
During this tutorial, we’ll learn to activate this menu called “Developer Options” and also, we discuss some important uses of this menu. That should help you start with this menu right after you activate it. Most of the time, this menu is unestimated and users probably use it for enabling the USB Debugging. Whereas, it has many options that can help you manage your phone smartly and make it better in many aspects. Therefore, you should keep reading this tutorial to learn some important things we can do using the Developer Options no Pixel 3 and 3 XL smartphones.
If you ever wish to customize your phone for better performance and productivity, you must use this menu to start off. You can think of this menu an ethical way to get the most out our smartphone. This menu won’t hurt your phone until you use this menu correctly. As the Android OS evolves through time, the customization process becomes simpler and more effective. And there’s no need of rooting the device to get some extra privileges. Now, you can do most of the things on your phone easily and without having to root or rely on custom firmware. Without ado, we should get started with the main part of this tutorial. The following tutorial will help you enable Developer Options on Pixel 3 and 3 XL smartphone.
How to enable Developer Options on Pixel 3 and 3 XL
- Open the Settings menu on your phone.
- Scroll down and tap on System.
- Under this menu, scroll down and tap on About phone.
- Now, locate Build Number and tap 7 times to activate the Developer Options.
- Once this menu is activated, you’ll see a message “You’re now a developer” or something similar.
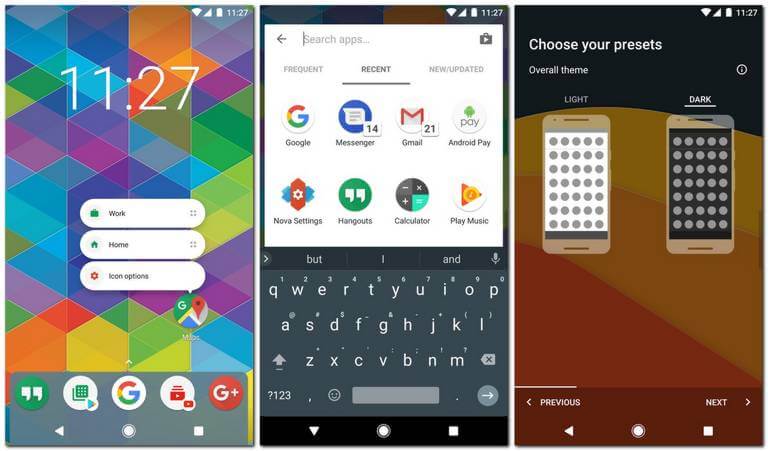
That’s it, you’ve successfully enabled the Developer Options on your phone. Now, you can access this menu directly from the Settings menu like this:
![]()
That’s the way to enable the Developer Options on Google Pixel 3 and 3 XL smartphones. You must know that this action would not hamper your phone in any way. However, there’s one recommendation. You shouldn’t use this menu unknowingly. That could lower down the user experience.
Since you’ve enabled the Developer Options on your phone, now you can proceed to activate further options like USB Debugging, customize animations and so on. It is strongly suggested that you thoroughly research this menu. This could help you intensively customize your phone for better performance, usability, and productivity.
For that purpose, below have discussed some important uses of this menu. Therefore, you can start using the Developer Options on your phone right away. Here are some of the best things that you could do on your phone using the Developer Options.
Best Developer Options tips and tricks for Google Pixel 3 and 3 XL
There’s a lot you do with this menu. Though it has been developed for developers and pros, that doesn’t mean that the average can’t use it. Below we discuss some useful tips while you use this mode to improve the device’s usability and looks.

1# Enable USB Debugging
Being the most common purpose of getting indulged with the Developer Options, the USB Debugging becomes essential when it comes to applying manual updates and firmware through third-party tools like Google Android Debugging platform and similar ones. If you ever wish to put a stock firmware or simply re-install the firmware on your phone, you would need this option enabled first on your phone.
Here’s how you can enable it:
- Open Settings menu.
- Tap on Developer Options on your phone.
- Now, scroll download and locate USB Debugging.
- Tap on this option to enable it.
That’s you’ve enabled the USB Debugging on your phone. Now, you can proceed further and connect your phone with update utilities.

2# Customize Animations
The user-interface of an Android OS has been blessed with some good looking animations that appear while we make a move, navigate, open apps, close them and so on. Of course, these animations make our phone make appealing and beautiful.
For the sake of performance, there’s one thing that you could and that works actually. You can reduce the extent and duration of the animations that happen. Since these animations use some amount of processing power, that consumption would be reduced to some extent. And that outcomes better performance.
Here’s how you can reduce the animations and improve performance on your Pixel 3 and 3 XL phone:
- Open Settings menu.
- Tap on Developer Options.
- Now, locate “Windows Animation Scale”, “Transition Animation scale” and “Animator duration scale”.
- Tap on each entity and reduce their value to 0.5X.
- Exit the menu and restart your phone.
That will reduce the extent and duration of the animations to half of their default values. That extensively improves the response time and somewhat overall performance.
If you find this above tip helpful in improving performance, do let us know your experience. That would help us bring more such tips.

3# Keep track of running services
Sometimes it becomes important to keep track of services running in the background. That helps to figure out the culprit apps/services that causing our phone to become heated, slow and behave abnormally. If you figure that your phone is behaving unnaturally or performing slow suddenly, then there are greater chances that there could some application or service consuming the whole processing power.
Also, that will help you disable those apps/services consuming most of the battery life. That’s the best thing that you can do on your phone.
The following steps will help you track running apps/services on your phone:
- Open the Settings.
- Now, open the Developer Options.
- Then, locate ‘Running services’ and tap on it.
That will list all the running services along with important metrics like amount of RAM, storage space, time and a few more things. So, you can thoroughly examine these services to find out if any of them consuming more than enough power resources.

4# Enable OEM Unlock
If you ever wish to unlock the bootloader on your Pixel 3 or 3 XL smartphone, you would need to enable the OEM unlock option within the Developer Options. Basically, it acts a protection over the firmware that resists custom changes applied to the firmware. Once you enable this option, you would be able to unlock your phone, install custom firmware, recovery and achieve root access.
The following steps will help enable you OEM Unlock on your phone:
- Open the Settings on your phone.
- Then, Developer Options.
- Under this menu, tap on OEM unlock.
That’s it. Now, you can perform custom operations on your phone.

5# Select USB Configuration
We are pretty confident that you’re going like this thing very much. The Developer Options allows users to set the default USB configuration. Once you set that, you would not need to select Charging, USB storage or anything else while connecting your phone to the computer. That surely reduces your efforts of making a selection between different connection options.
Here’s how you can set the default option:
- Open the Settings menu on your phone.
- Now, tap on Developer Options.
- Under this menu, tap on ‘Set USB Configuration’.
- And select the desired default configuration.
That’s it. Going forward, each time you connect your phone to the computer, there’s no need to select USB configuration. That surely comes handy as it sounds. Must try this setting on your Google Pixel 3 and 3 XL smartphone.

6# Limit background process
When you figure that you are running out battery power, you will enable the battery saver mode. And of course, that does the job pretty well. What if there’s one more thing that could help you. Irrespective of the fact that you’ve enabled the battery saver mode, multiple processes keep running in the background.
And it is obvious that they utilize battery life and processing resources to keep up. This is actually what I do when I face lower battery power issues. Or when I need a boost in the overall performance. The Developer Options allows us to limit the background process.
That means, you limit the processes and services to run in the background. There will lower down usage of the battery power and somewhat improve the overall performance. It’s surely worth you try when your device runs out of battery life.
Just follow the below steps to limit background processes:
- Open the Settings menu.
- Tap on Developer Options.
- Now, look for “Limit Background process” and tap on it.
- Then, choose a limit that you want to set.
Most of the settings ‘4 background processes’ limit is good enough to save battery life and performance. Do implement this tip and let us know whether it helps you or not.
We would be glad to hear your feedback.

7# Enable Force GPU Rendering
Just like our traditional computers, our smartphones use the processing power to render some graphics part. And to render any part of the graphics through CPU takes huge processing power. Even our smartphones are usually blessed with GPU chip-on-board, however, it not used for all graphics requests.
Therefore, if enable the ‘Force GPU Rendering’ option in this menu, that redirects almost all graphical requests to the dedicated GPU chip and the CPU would be free to do other work. That’s one more way to improve performance and the improvements can be measured within the applications.
Now, the following instructions will guide you to enable this option on your phone:
- Open the Developer Options on your phone.
- Under the menu, look for Force GPU Rendering.
- And enable this option.
You’ve done it. Now, the graphical requests should be handled by GPU most of the time. The CPU would be free for other tasks.

8# Fake your location
Have you ever played Pokemon Go without stepping out your home? If not, then you must try it. There are tons of useful application available for Android smartphones. There are some applications that let you fake your current location too. In order to work with such application, you gotta use the Developer Options and select that fake location application.
Though there are tons of such applications, we recommend you to use Fake GPS Location Spoofer. We application very useful and it works seamlessly good.
Here are the steps that you need to follow:
- First, download and install the GPS Location Spoofer app from the Google Play.
- After that, open the Settings menu.
- Then, tap on Developer Options.
- Now, tap on ‘Select mock location app’.
- Then, select the GPS Location Spoofer application from the list.
Now, you can use this application to hide your real location easily. You can easily fool your friends and surprise them.

9# Improve gaming performance using Force 4x MSAA
These Pixel smartphones have solid configurations that make them portable gaming consoles. If you love to play games on your phone, then this tip is for you. There’s an option called ‘Force 4x MSAA’, once enabled the GPU chip is forced to render gaming visuals at higher frame rates. Which improves overall gaming performance and visuals.
However, there’s one disadvantage of using this option. You should know that while this option is enabled, the battery consumption of the phone will be higher. It will drain the battery sooner than usual time. So, you should use this option precisely.
To improve the gaming experience on your phone, just implement the following steps:
- Open Settings on your phone.
- Tap on Developer Options.
- Now, look for “Force 4x MSAA” and enable it.
- Exit this menu and reboot your phone.
Remember, you might not observe huge improvements. However, to some extent, it is going to help you have a better frame rate and visuals.

10# Select Bluetooth Audio Codecs
This feature was implemented with the launch of the Android Oreo operating system and has been passed down to the Pie firmware. This option really makes Android devices much better as compared to any other devices. Through this menu, you can choose between different Audio codecs that work best for your Bluetooth headsets.
Like for my headsets, Qualcomm aptX HD audio Codec works best. You would get different options to select and try. You would be amazed figure how it improves the overall sound and music quality.
Here’s what to do to select an appropriate Bluetooth Audio code:
- Open the Settings on your phone.
- Now, tap on Developer Options.
- There, tap on Bluetooth Audio Code.
- Select the Audio Code from the given list.
Make sure that your Bluetooth device is connected while you select the Audio Codec from the list. Select the one that fits your music needs perfectly.
That ends our list of best Developer Options tips and tricks for Google Pixel 3 and 3 XL smartphones. We hope that this should be enough for our readers to get started within this option and improve their overall experience on the phone.
Did you like these tips? If yes, do share your feedback in the below comment section. We would love to hear from you.