How to Root Samsung Galaxy Note 9
Achieving root access gives some extraordinary privileges for customization and personalization purpose. You can access or edit the core settings of the Android operating system with the root access. There are multiple benefits of having a rooted smartphone. In this tutorial, we’ll help you to root the Samsung Galaxy Note 9 using the TWRP recovery mode. If you’re anything serious about customization, then you must perform this custom operation. This will help you access the core settings of your phone, thus you can customize and personalize your phone well. With the root access, you can get the most out of your Note 9.
Most importantly, for root users, there are countless applications that improve productivity and usefulness. These applications add many useful functionalities to our smartphone. In order to attain the root access on the Galaxy Note 9, we need a custom recovery like TWRP. The custom recovery helps to carry out advanced tasks like rooting and creating a Nandroid backup. Basically, the root process removes the factory restrictions from the device. So, third-party apps and services can change them. Therefore, users can easily customize their phone the way they want. Moreover, if you’re planning to optimize the general performance on your phone, you must start by rooting it.
Once the root access is ensured, you can choose to update your phone with custom firmware and apply third-party mods. Currently, there are many custom firmware available having better features and functionalities, those we won’t find on the stock firmware that easy. Afterward, you can get rid of the unnecessary (the bloatware) apps on your Galaxy Note 9 or take care of processor profiles, that improves performance and battery life. However, there is one that you should remember before you perform this custom operation. The rooting process is not appreciated by Samsung and Google in any way.
That means if you continue to perform this action, it will void the warranty of the phone. You better read all the terms and condition of the warranty. The root package is developed and distributed by third-party teams and you cannot associate them with Google and Samsung. Once you perform this action, you’ll not able to service this smartphone under the warranty terms. If you wish to restore the warranty terms, you will need to restore the stock firmware on your phone. In that way, it will restore your phone, remove the root access and other customs operations, and of course, restore the warranty.
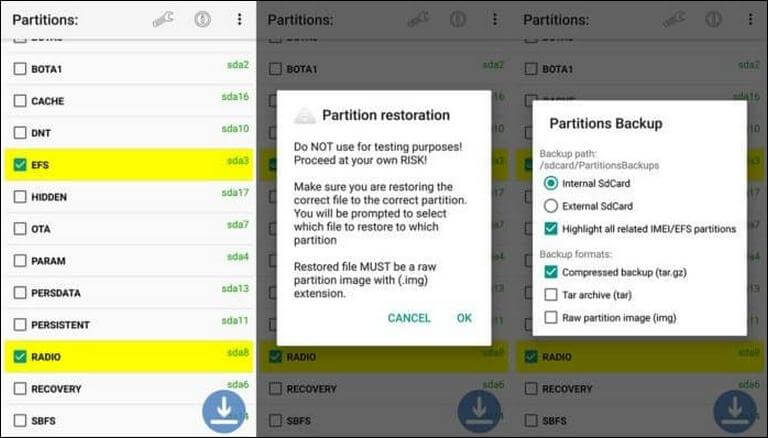
Anywhere, you can gain the root access on your phone if you have the TWRP recovery installed on your phone. Without this custom recovery, it won’t be possible to achieve the root access on this smartphone. There many benefits of having TWRP recovery on the phone. If you ever want to install a custom firmware, this supports them. While you perform such custom operations on your phone, you can back up the firmware running on your phone. That makes things safer. We have already published a dedicated guide for this purpose:
You just need the TWRP recovery image to root this smartphone. That will not much time of yours. You can install this recovery in just a few minutes. Before we begin, read all the prerequisites mentioned below.
Prerequisites
- We dedicate this tutorial to Samsung Galaxy Note 9 smartphone. One shouldn’t use this tutorial or any of the files mentioned on any other smartphone. Apparently, that can hurt your phone.
- Since we’re performing some sorts of custom operation, there are chances that we get our phone bricked or we need to perform a factory reset to make it work. Therefore, a general backup is highly recommended. Must follow our guide →How to backup Samsung Galaxy Note 9.
- Performing this action voids the warranty of the phone. You must certain yourself with this fact and only then proceed further. To revert these changes, you need to flash the stock firmware on your phone.
- As we have already discussed, you need a custom recovery like TWRP. Without such a recovery image, it won’t possible to root this smartphone through this tutorial.
- Charge your phone at least 50% before you go any further. If your phone dies while we execute this action, that can harm your phone or it can brick it.
You must read all the prerequisites thoroughly and prepare your phone accordingly. Now, you’re ready to get into the real action and attain the root access on your Samsung Galaxy Note 9 smartphone.
How to Root Samsung Galaxy Note 9
- First, download the root package file from →here (SuperSU-v2.82-201705271822.zip) on your phone. Just remember the name and location of the file on your phone. Will will flash this package through the recovery mode.
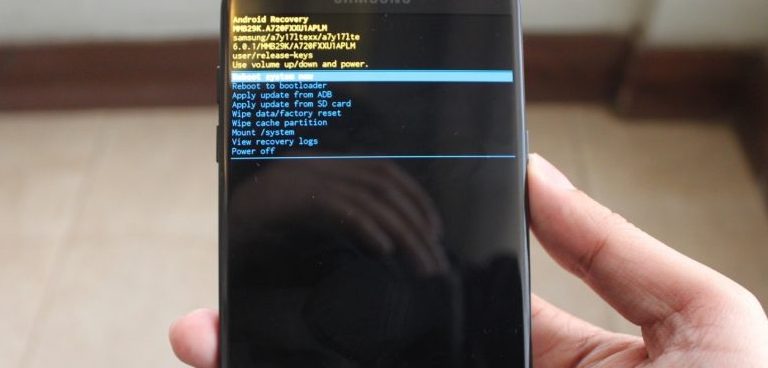
- Now, turn off your and boot into the recovery mode → Boot into the recovery mode on Galaxy Note 9 or follow the below steps:
- Turn off your phone.
- Now, press and hold Volume Up, Bixy and Power buttons altogether.
- Release these buttons once Samsung logo appears.
- Then select the recovery mode from the menu and enter into it.
- To install the root package, under the TWRP recovery menu, tap on the ‘Install’ button.
- Then, locate the root package file and wipe right to install this package on your phone.
- This process might take several minutes. Once it is completed, reboot your phone.
That’s it. You’ve rooted your smartphone successfully. To check whether root privileges have been given or not, open the Google Play store and install the Root checker application. Use that application to confirm the status of the root access.
Troubleshooting
There are some chances that your phone might get stuck at the boot screen, and won’t move further. So if that happens, there is not need to worry a lot. Just follow the below troubleshooting steps to make it work:
- Turn off your phone using the power button.
- Now, boot into the recovery mode.
- Then, tap on the Wipe option and perform it. (Factory reset)
- Exit the recovery mode.
Or follow this tutorial to perform a factory reset on your phone:
Now, your phone will boot up and take you to the home screen soon. Because we have performed a factory reset on your phone, you’ll need to enter your Google account details and configure the settings.
You’ve successfully achieved the root access on your phone. That ends our tutorial here and we hope that our readers would appreciate our efforts. Share your thoughts and feedback in the comment section below. We would love to hear from you and make our tutorials better.


Will this work on snapdragon phones or exnyos only. Also what about Verizon note 9?
It works on the Snapdragon. For others, you need to wait.
Is SM-N960F, which I have,the same as N960F ?
Will your rooting method work?
I was reading few months ago opinions that Snapdragon can not be rooted for now.
Thank you for your replay and great , detailed instructions.
Best regards,
Adam P. Anczykowski
Yes, this method should work.