How to Enable USB Debugging on Google Pixel 3 and 3 XL
Here’s a quick guide that aims to help you enable USB Debugging on your Google Pixel 3 and 3 XL smartphones. While you try to customize and optimize your phone more precisely, you may need to access this feature and activate it. Basically, USB Debugging option enables the Android devices to become compatible with different Android tools like ADB, PC suits and similar ones. Therefore, using these Android tools, you can update your phone, customize it and tweak further for better performance and productivity.
Also, there are some advanced applications that need such access. And of course, that’s no big deal to enable this option on these two smartphones. Before we can actually access and enable this option on your phone, we need to get our hands on the Developer Options first. This menu comes hidden on almost all Android smartphones. This panel features some really cool settings and options. If used correctly, users can easily manage to get the most out of their smartphones. Primarily this menu is accessed and used by the Android Developers.
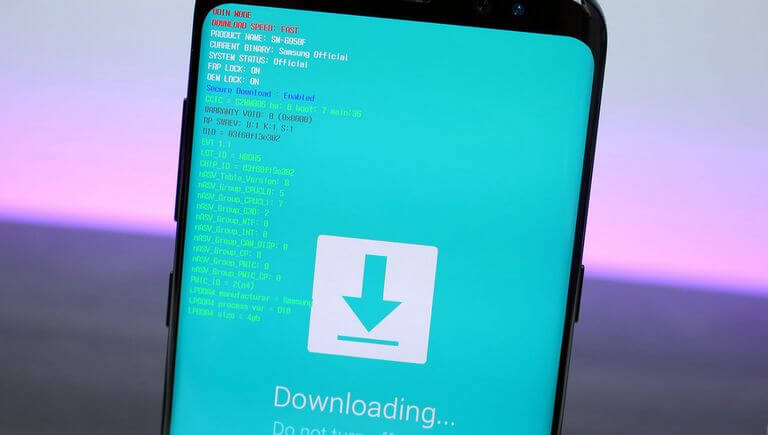
The Developer Options is built with all intention to help Android Developers to make better stuff for Android smartphones. That’s the only reason that this menu is hidden by default. Because this menu comes inbuilt, accessing and using it won’t void the warranty on your phone. And once we get into the Developer Options, we would get the access to USB Debugging and enable it on Google Pixel 3 and 3 XL smartphones. Thereafter, you can apply different manual actions on your phone. Like you can upgrade or downgrade firmware on your phone. Also, you can apply OTA updates as well.
There is no harm in customizing your phone until you know the correct steps. While you perform any sort of custom operations on your phone, we strongly recommend you to back up your important. It happens many times that we try to update or tweak our phone and end up messing up things. And we cannot revert such actions. Therefore, you should take proper safety measures prior to performing such actions. The Google Pixel 3 and 3 XL come with Google Drive and Photos applications. You can rely on these apps to carry out this task.
Or you might want to sync your files to your computer’s drivers. For that purpose, we suggest you use the Smart Switch application. It can help you back up data on your local drives. It is quite frequent to observe smartphones to get stuck somewhere, right after we update or perform some similar actions. And when it happens, probably we need to factory reset our phone to make it work again normally. That surely deletes everything that is stored within the memory and that’s really hard to recover the deleted files. If you do back up before such actions, you won’t lose your precious files and data.
Therefore, to enable the USB Debugging on Google Pixel 3 and 3 XL, we shall first enable the Developer Options on these two smartphones. The following instructions are set to help you enable this menu on these smartphones:
Enable Developer Options on Google Pixel 3 and 3 XL
- Open the Settings menu on your phone.
- Scroll down and tap on System.
- Under this menu, scroll down and tap on About phone.
- Now, locate Build Number and tap 7 times to activate the Developer Options.
- Thereafter, the Developer Options will be activated.
Now, you can access this menu anytime you want through the ‘Settings’ panel. This menu looks like this:
![]()
We have published a dedicated that explains about this menu and some good tips to use this menu for ultimate benefits. You can read our guide below:
- How to Enable Developer Options on Pixel 3 and 3 XL [+Useful Tips]
- How to take screenshots on Google Pixel 3
We strongly recommend you to thoroughly visit this menu on your phone. This can help you achieve better performance and productivity on your phone. There are many options that are set to improve the overall user experience. You must check the above guide.
Now, the following steps should help you access and enable the USB Debugging on your phone:
How to enable USB Debugging on Pixel 3 and 3 XL
- Open Settings menu.
- Tap on Developer Options on your phone.
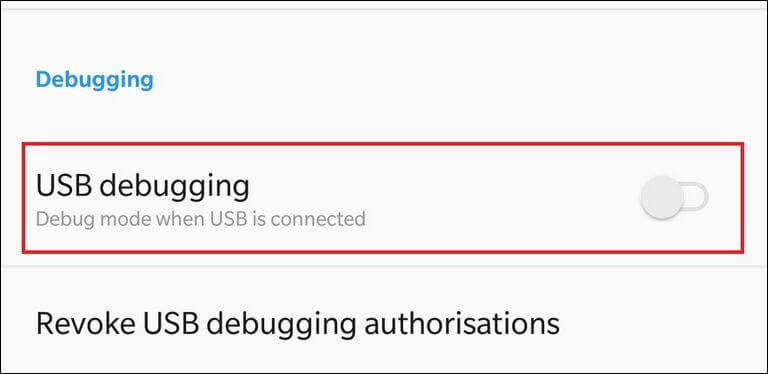
- Now, scroll download and locate USB Debugging:

- Tap on this option to enable it.
- Now, exit the Developer Options.
That’s the way to enable USB Debugging on Google Pixel 3 and 3 XL smartphones. Thereupon, you can connect your phone with different Android tools like Google Android Debugging, Smart Switch, PC suits, and other firmware flashing tools. These become important when it comes to re-install or downgrade firmware on our phone.
Must see:
More precisely, the USB Debugging function allows users to pass different command lines through the computer to push updates, firmware and flash various modes. You can use the ADB tool to send various commands to optimize and tweak the phone.
That ends our tutorial here that explains appropriate steps to enable USB Debugging on Google Pixel 3 and 3 XL smartphones using the Developer Options. That should come in handy in many conditions. We hope that our Google Pixel users would find this tutorial helpful. Do let us know your thoughts and feedback in the comment section below. We would love to hear from you and bring more such contents for readers.
![10 Best SEMrush Alternatives To Make Your SEO Like Larry Kim’s [2022]](https://techshali.com/wp-content/uploads/2022/01/best-SEMrush-Alternatives-390x220.jpg)