How to install TWRP Recovery on Samsung Galaxy J7 Prime
Launched in the year 2016, the Galaxy J7 Prime has been one of the most popular smartphones from Samsung so far. This handset is perfect for budget-friendly smartphone seekers. The smartphone enough RAM and processing power to perform well in most of the circumstances. If you wish to get more control over it and tweak it further for multiple enhancements, you should consider installing the TWRP recovery and then rooting this smartphone. In this tutorial, we’ll help you to install the TWRP recovery on Samsung Galaxy J7 Prime smartphone in the possible simplest manner.
You must have information about this custom recovery image, and the root procedure. Then, you must certain yourself with the fact that both actions void the warranty of your phone. Installing the TWRP recovery and rooting your Samsung Galaxy J7 Prime is against the manufacturer’s terms and condition. Thus, you acknowledge the same. To redo these actions, you must install the stock firmware on your phone. That is merely the way to get your phone restored with the warranty terms. And other custom aspects will get replaced with the stock aspects.
The TWRP recovery has multiple benefits over the stock recovery image. The most noteworthy thing is that it allows you to flash custom firmware and third-party mods. If you ever wish to install a custom firmware like LineageOS, then the TWRP recovery becomes a mandatory tool. Moreover, this recovery has some advanced tools that allow users to back up the native firmware running on the phone. That comes extensively helpful for users who prefer to test different custom firmware and mods frequently. Once you create a backup of your firmware, you can try new apps (must see our collection of best apps for Samsung Galaxy phone) and firmware without worrying about getting bricked.

In order to install the TWRP recovery on the Samsung Galaxy J7 Prime, we use the Odin flash tool. We will flash the TWRP recovery image on the phone using this tool. There are some risks involved in this procedure too. Since we are doing something that is against the manufacturer’s terms, your phone might get bricked. Also, there are chances that you lose all the data stored on your phone. Therefore, we recommend you to back up all the important stuff before you step ahead. To make the backup process easier, follow the below backup guide:
If you’re not completely sure about these actions then you mustn’t involve with them. This procedure suits best to advanced users of the Android software. Below, we mention some important prerequisites that you must read and follow. Make sure to arrange the requirements.
Prerequisites
- The recovery image we mention here and this tutorial is only for Samsung Galaxy J7 Prime smartphone. For other smartphones, it is nothing more than junk files. You shouldn’t use them on any other smartphone. That can bring unknown problems on your phone.
- Installing the TWRP recovery image on your phone will void the warranty on your phone. You must be sure about your actions. If you ever wish to restore the warranty, you gotta install the stock firmware on your phone.
- It is recommended that you create a general backup your phone. There are chances that we need to wipe out your phone. Thus, having a backup would give you a relief. You can use backup applications or Samsung Smart Switch app to backup things on your phone. Must follow the backup procedure we’ve mentioned above in this tutorial.
- Enable the USB Debugging on your phone. That is necessary to connect your phone to the computer and establish a proper connection with the Odin tool. Follow this guide — Enable USB Debugging on Samsung Galaxy smartphones.
- At last, charge your phone to a good extent. It shouldn’t turn down while we install the TWRP recovery image on this phone.
That’s all about the preparation you need. Now, you’re ready to install the TWRP recovery image on your Samsung Galaxy J7 Prime smartphone. That will extend your access and privileges to do with more with your phone.
How to install TWRP recovery on Samsung Galaxy J7 Prime
The installation is somewhat similar to unbrick process that we usually perform on Samsung smartphones. Instead of the stock firmware file, we will flash the TWRP recovery image. The following instructions are intended to help you while you install the TWRP recovery on Galaxy J7 Prime:
Step 1. Download and run the Odin tool
The very first step is to download the Odin tool from this →link on your computer. Extract the content of the compressed package to obtain the Odin program.

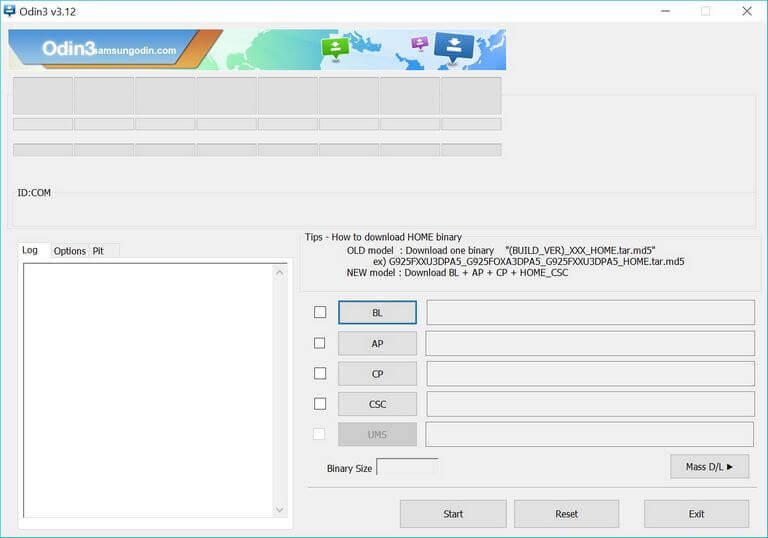
Now, run the Odin program on your phone. The Odin tool looks like this:
Step 2. Download the TWRP recovery image for your phone
Next, download the TWRP recovery image file from →here. Extract the content of this package to obtain recovery.img file.
Step 3. Get into the download mode
In order to flash this recovery image on your phone, you need to boot your phone into the Download mode.
- Power Off your phone.
- Press and hold Volume Up, Volume Down and Power until the Samsung logo appears.
- On the next screen, use Volume Up button into the Download mode.
That should enter your phone into the download mode.
Step 4. Connect your phone to the computer
Now, use a USB cable to connect your phone computer. The Odin tool will recognize your phone automatically
The ID:COM section will turn to blue on Odin program. If nothing happens like that, try installing the USB drivers of your phone on the computer.
Step 5. Install the TWRP image on your phone
Now, you’re all set to flash the TWRP recovery image on your phone.
- Tap on the ‘AP’ button.
- Then, load the extracted TWRP package file.
- Next, hit the ‘Start’ button to start the process.
- Once it is completed, detach your phone.
The process is complete now, You’ve successfully installed the TWRP recovery on your phone. Now, you can proceed further tweaking your phone like putting a custom firmware, achieving root access, and try different mods.
If you find that your phone is stuck at the boot logo or something similar happens, then perform a factory reset on your phone using the recovery mode. The following guide will help you to reset your phone:
That is how you can install this custom recovery image on your Galaxy J7 Prime smartphone. Do share your thoughts and views in the comment section below. We will reach out to you at the earliest.


hey,
link for twrp recovery image file are not Working
thanks!
link not working
Link isnt working :'(