How to install TWRP Recovery and Root Galaxy A8+
If you’re looking for a budget-friendly smartphone having a super AMOLED infinity display and packed with the powerful processors, then the Samsung Galaxy A8 Plus would the ideal one. This smartphone has a super stylish body, somewhat similar to Galaxy S9. If you want to go further and get more control on your phone, then root access becomes a necessity. In this tutorial, we’ll help you to install the TWRP recovery and then root the Samsung Galaxy A8 Plus smartphone.
After you’ve rooted your phone, you’ll have more privileges to do more with your phone. In order to root the Samsung Galaxy A8+, we first have to install the TWRP recovery image. Basically, the TWRP is a custom recovery that intends to improve the functionalities of the recovery mode. It gives you more options, convenient enough to manage your phone, and provide some advanced features as well.
Through the TWRP recovery menu, it becomes easier to install custom firmware, recovery, and third-party mods. Even it helps to create a backup of the firmware. That surely helps a lot. Thus, we’ll first focus on getting TWRP recovery image installed on Galaxy A8+ and then, we will root it using this mode. Acquiring a root is not tough. However, it is a custom thing that we do on our phone.
Rooting and installing the TWRP recovery on Samsung Galaxy A8+ void the warranty terms and condition. It simply triggers the Knox, that voids the warranty on your phone. Therefore, before you jump further, be sure about your actions. Even putting the stock firmware back won’t work to bring the warranty back. Thus, you better read all the terms and condition regarding the warranty on your phone. Once you have rooted your phone, you might not be able to attain the warranty again.
Apart from that mere thing, rooting has many advantages. The rooted smartphones have extended privileges to do a lot more. With the root access, one can access and edit the core settings of the Android operating system. For better customization and personalization, root access can help a lot. You tweak your phone for better performance and productivity. There are countless root specific applications that can dramatically improve the usefulness of your Samsung Galaxy A8 Plus. Noteworthy thing is that both the processes are simple to understand and perform.
Must see:
To replace the stock recovery with the TWRP recovery image, we will use the Odin flashing tool. For Samsung users, the Odin tool has been always a life-saver. The Odin tool allows users to flash firmware files, custom recovery, images, and some other tasks. To work with the Odin tool, you need a Windows-based computer. After that, we will use the TWRP recovery to flash the root binary files. Both the processes are safe to perform, however, circumstances don’t well as we want. Thus, we recommend you to create a backup of your phone.
You should start by creating a backup of your photos, videos, documents, contacts, and other important stuff. If anyhow your phone gets wiped out, it won’t be possible to recover the deleted files. Therefore, you should save your important work before you go any further. Nowadays, there are countless applications that serve the same purpose. Head to the Google Play store to locate these applications and backup your phone. Before we begin both processes, we should discuss some important prerequisites.
Prerequisites
- This tutorial merely works for Samsung Galaxy A8+smartphone. It is not supposed to be used on any other smartphone. That can bring uncertain problems.
- You’re about to void the warranty of your phone. Installing a custom recovery like TWRP, and rooting void the warranty terms. This process simply triggers the KNOX of your phone. Be sure about your actions.
- For safety purpose, we suggest you back up your phone before you move ahead. If somehow you end up losing your data, then it won’t possible to get it back anyhow. Therefore, you should care about your data and create a backup of your phone.
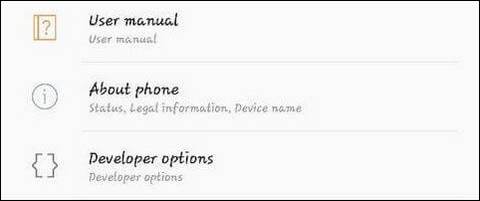
- Enable USB Debugging – Since we are going to connect the phone to a computer, you need this option to be enabled. Follow this →tutorial to enable the USB Debugging option on your phone.
- Install the USB Drivers of your phone to your computer. These are required to establish a connection with the computer. You can download the Samsung USB Drivers from →here.
- Have your phone charged to a good extent. More than 50% is good enough.
These are the preparation you need to do before beginning the process. Next, we will first install the TWRP recovery on your phone. Using that recovery image, we will flash the root binary files and achieve the root access on Samsung Galaxy A8 Plus.
How to install TWRP Recovery and Root Galaxy A8 Plus
1. Install TWRP Recovery on Galaxy A8 Plus
- Get the TWRP recovery image for Galaxy A8 Plus from here and download it to your computer. Save this file on your computer and remember the name and location.
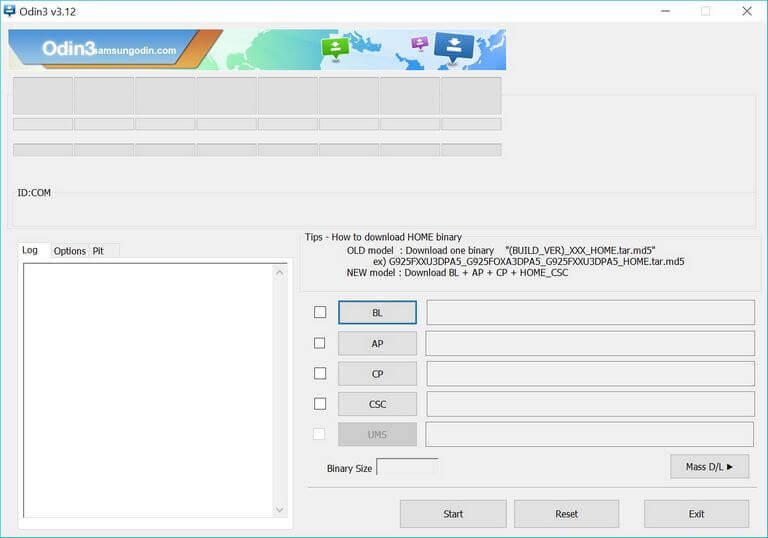
- Now, download the Odin tool from here. After you download the file, extract this package on your computer. Inside, you’ll get an executable file. Double tap on that program to run it.

- Then, the Odin program will load. The tool looks like this:

- Now, turn off your phone and get into the download mode — press and hold the Power, Volume Down and Bixby at once. Release all buttons once the Samsung logo appears on the screen. Then, you should enter into the Download mode.
- Next, connect your phone to the computer using the USB cable.
- The Odin tool will recognize your phone and ID:COM section will turn to blue. If nothing happens, then you should install the USB Drivers again.
- Now, tap on the ‘AP’ button and load the downloaded TWRP recovery image file.
- Then, hit the ‘Start’ button to begin the process.

Once the process is completed, take off your smartphone. Your phone will reboot and take you to the home screen soon.
For the first boot up, it might take several minutes. It happens normally, so there is no need to worry about it. Since we have installed the TWRP recovery on the Samsung Galaxy A8 Plus, now we can move forward to root it.
2. Root Samsung Galaxy A8 Plus
As have installed the TWRP recovery image, not it is very easy to root this smartphone. We will enter into the recovery mode and install the root binary files. Follow the below instructions to achieve root access on your phone:
- Download the Root package file from →here (SuperSU-v2.82-201705271822.zip) and save it on your phone.
- Now, turn off your phone using the Power menu.
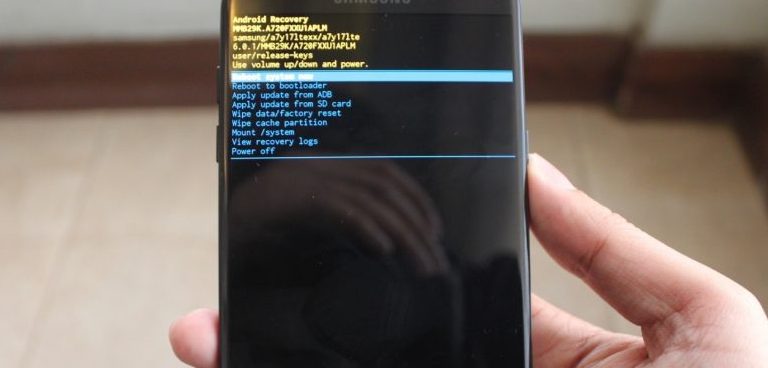
- Next, boot into the recovery mode. Follow →this tutorial to get into this mode.
- Under the recovery menu, tap on the Install button.
- Then, locate the downloaded root package file and install it.
- Once it is installed, exit the recovery menu.
That’s all you gotta do to root your phone. To check the root access, download the Root Checker application on your phone from the Google Play store.
You’ve managed to install TWRP recovery and root your phone. Now, enjoy the goodness of thousands of feature-rich root applications on your phone. Tweak your phone for better performance and productivity.
That ends our tutorial here and we hope that our readers would get benefits from this. Don’t forget to share your thoughts about this tutorial in the comment section.