How to Install TWRP Recovery on Samsung Galaxy J8
There is no doubt that the recovery mode is one of the most useful privileges given to Android users. We already aware of the usefulness of this mode. And through a custom recovery, its functionalities can be extended further. In this tutorial, we’ll help you to install the TWRP Recovery on Samsung Galaxy J8, a custom recovery intends to improve features and accessibilities. If you’re moving forward to root your phone or install a custom ROM, you first required to install a custom recovery like TWRP. That becomes mandatory to perform such actions. In that way, you can make your phone more productive and useful.
Once you have the TWRP recovery on your Samsung Galaxy J8, it becomes seamlessly easier to achieve root on it. Thus, it becomes important to learn this procedure. While we detail you with the required steps, we’ll also intend to aware about the involved risks, and prerequisites to be followed. First of all, performing such actions void the warranty on the device. With custom recovery installed on your Galaxy J8, you’ll lose the warranty terms. However, it restores back as we flash the stock firmware. Therefore, you must consider this thing. If you wish to use your smartphone without factory restrictions then you must read this tutorial thoroughly.
These lines explain the procedure to install the TWRP recovery image on the Samsung Galaxy J8. This could be your first towards getting core-access to your smartphone. After that, you have different methods to personalize it even more. Basically, the TWRP recovery gives you extra privileges that help to manage the smartphone in a better way. You’ll have multiple options to optimize and sustain a stable and fast performance on your phone. Most importantly, when it comes to flash a custom ROM, this recovery is most needed. Certainly, it helps to flash third-party ROMs and custom mods. That can explicitly improves the productivity and usefulness of our smartphone.
In basics, we’ll replace the stock recovery that comes default on Android phones with the TWRP recovery. Specifically, build to provide more privileges. With the stock recovery, you get some limited features that put everything in a limit. Whereas, the custom recovery like TWRP, extends those limits and provide some extraordinary features. That brings more opportunities for improving user experience and provide better customization.
After you the TWRP recovery installed on the Samsung Galaxy J8, you can easily create a Nandroid Backup that includes the operating system itself. Thus, you can go further and try new things on your phone without worrying about getting bricked or something bad happens.

So far, you must understand that advantages of the TWRP recovery. However, this action certainly doesn’t compile the manufacturer warranty terms and condition. Install the TWRP recovery will break and you’ll lose the warranty. If you wish to restore everything, you’ll have to flash the stock firmware on your phone. Once you flash the official stock firmware on your phone, that will replace the custom recovery, the TWRP recovery with official stock recovery along with the operating system. In short, it will turn your phone into a factory fresh piece having no third-party customization added. That way, you get your warranty restored.
Also see:
- List of best apps for Samsung Galaxy smartphones
- The best games for Samsung Galaxy J8
- How to access Developer Option on Android and use it for better performance
In order to flash the TWRP recovery image on Samsung Galaxy J8, we will use the Odin program. This tool is very popular among Samsung users. It helps to flash custom firmware and recoveries on these smartphones. Although, this process has nothing related to data present on the phone, but still we shouldn’t take any risk. So, a general backup is highly recommended. You must backup all important stuff like messages, contacts, photos, and videos. You can use the backup applications or sync your data on Google Drive. That is a much safer way to install the TWRP recovery on Galaxy J8. Thoroughly read all the prerequisites we mention below:
Prerequisites
#This TWRP recovery image is only for Galaxy J8 and you shouldn’t use it any other smartphone. That could break the things. It is better to check the model number before doing so. Just open the Settings->About Phone-Model number (or similar method).
#We highly recommend that you create a backup of your phone. In that way, you can avoid problems like data might get corrupt or deleted post performing this tutorial. So, avoid such situations and have everything stored somewhere safe placed.
#You need to enable the USB Debugging on your phone. So, it can communicate with the Odin tool while connected to the computer. We have already published a tutorial for the same. Follow the below tutorial:
#As we have detailed already, you need a Windows-based computer, a laptop or desktop. And you must install the USB Drivers of your phone on that computer. You can download the Samsung USB Drivers from →here. That ensures that your phone establishes a proper connection with the computer.
#And that last thing, charge your phone to at least 50%. If something bad happens post flashing the recovery image, we’ll use the recovery mode to cure that issue.
That’s all you need. Now, you’re ready to move ahead and install the TWRP recovery on your Samsung Galaxy J8 smartphone. That should help you in getting extended features and optimization opportunities.
Install TWRP Recovery on Samsung Galaxy J8
- First of all, you should start by downloading the TWRP recovery image from → here.
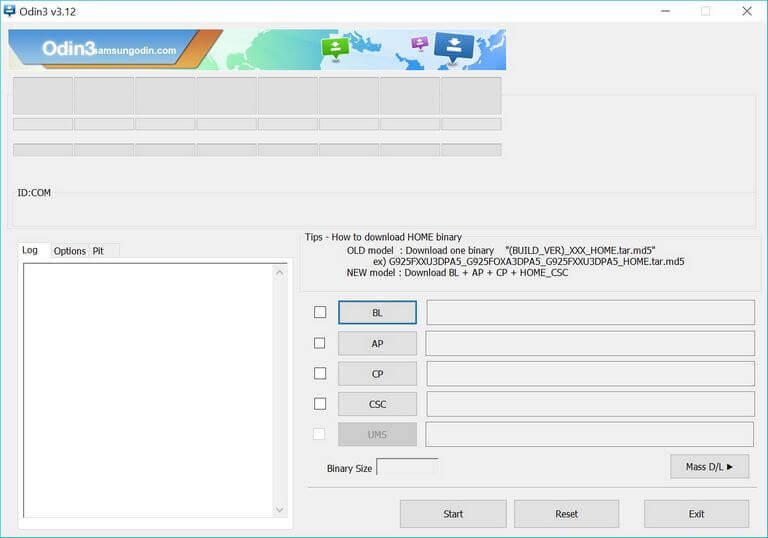
- Download the Odin Flashing program from →here and extract the content of the package on your computer. You’ll obtain an executable file from this package. Run the executable file to open the Odin program:

- Now, turn OFF your phone and boot into the Download Mode — press and hold the Power, Volume Down and Bixby buttons together for a few seconds. It should enter into the Download mode soon.
- Using a USB cable, connect your phone to computer. The Odin program will detect your phone and the ID:COM section will turn blue. That indicates that your device has been recognized. If nothing happens like that, consider installing the USB Drivers again.
- Now, tap on the AP button and load the downloaded TWRP recovery file. Do not make any other changes.
- Tap on the ‘Start’ button to begin the flashing process.
- Once the process gets finished, a PASS! message will appear. That means the file has been successfully flashed on your phone.
- Now, take OFF of your phone from the computer.
Your phone will reboot and take you to the home-screen soon. That’s it, you’ve successfully installed the TWRP recovery image on your Samsung Galaxy J8 smartphone.
Since we have applied some sort of third-party package, you might end up showing some errors (rarely happens). Your phone might not boot up as it does normally. Or it might get stuck with the boot-loops error.
If something like that has happened, you should consider trying the below troubleshooting:
- Turn OFF your phone.
- Enter into the recovery mode on Galaxy J8
- Under the recovery mode, perform below actions:
- Wipe data/factory reset
- Wipe cache partition
- Exit the recovery mode.
That’s it. Now, the TWRP custom recovery is running on your Samsung Galaxy J8 smartphone. Now, you should experience the extended features in the recovery menu. You can easily proceed further to achieve root and install a custom firmware on your phone. These custom ROMs has tons of customization and optimization features.
If you stuck anywhere in this tutorial, make use of the below comments to reach us. We will be glad to help you out with the appropriate solution. Stay connected with us for more useful content and tutorials.


![Tikcotech: What It Is [Before You Visit or Download Anything]](https://techshali.com/wp-content/uploads/2026/04/Tikcotech-explained-390x220.jpg)

I have successfully flashed twrp with pass signal but still I am getting old recovery rather den twrp
Hi Ashish, it shouldn’t happen. Try to flash it one more time. I hope that would sort the problem.
unsuccessfully.
I add the .img file in Odin. Installing without fail installation with success restart in recovery more appears stock recovery in the wake of Twrp
Try it once more time. It should work
link not working send fresh link
Hi there,
Please know that link has been fixed now!
Bhai ye img file to Odin me show hi nai karta
The .tar file has been updated. Use this file.
.img File loaded but error occured
Shows in phone “unsupported dev_type”
Please help.
Custom Rom For J8 Please Brother With Google Camera
Deepakji,Flash Fail!!
Flashed Few times! But Still fail!
What is the Solution Bro?
Exactly what error you’re getting. If possible, try to share a snapshot of the error.
Deepakji,i could not attach here the screenshot!
i send it to your mail!
Please give me a solution!
I have checked that snapshot, just download the latest version of Odin and try it once more. That should work.
Deepakji,
Tried all Versions of Odin:
(Odin3_v3.13.1/Odin3_v3.12.7/Odin3_v3.12.5/Odin3_v3.12.4/Odin3_v3.12.3/Odin3_v3.11.2 etc..etc)
But No hope! Still showing Fail!!
Is it work for j8 2018 model sm-j810g
?
Yes , it does work for this model.
Deepak Bhai,
Still Not Possible on My Galaxy SM-J810G-DS(Flash Fail)
Anything extra to do in Developer Option of the device?
As You Expalined in Step 3.
“Now, turn OFF your phone and boot into the Download Mode — press and hold the Power, Volume Down and Bixby buttons together for a few seconds. It should enter into the Download mode soon”
What do you meant by Bixby Buttons?
In my case Download mode only getting when Switch off the device,connect the USB cable with Laptop,and while pressing volume up and down button togther,connect the USB cable with the device!!
Thanks for the update. Some models do include a Bixby button, so we have mentioned that. If your device doesn’t have that button, just press Volume down and Power button to boot up to the download mode.
But in that case also(Even with latest versions of Odin,I am getting Flash fail!!
bro its fild for samsung SM-J810F Android 8.0.0
Its not going past the
Setuoconnection..
stage
Funciona para SM-J810M
That’s good to know that it worked for your SM-J810M
Can it work without a pc ?
No, you need a PC.
O meu e este mesmo modelo e da fail no odin
Me dio FAIL… tuviste q intentar varias veces?
funciona para el j810m
Yes, it does!
Tem certeza que funciona no j810m eu tenho um de 64GB baixei esse twrp baixei o Odin atualizado e dar falha
tenho meu OEM ativado e tenho o modo depuração USB ativado TB eu queria instalar o Referido Wolf recovery mais vi que para isso preciso do twrp e acho que esse outro twrp não é para todas as marcas.
Bro, I’m not able to get proper TWRP file for my Samsung J810G/DS.
my device is samsung j810Y, and your provided twrp doesn’t work
Hi ..
My devices is SM-j810Y/DS
Can you help me to downgrade pie to oreo..
This pie make camera a lot noise right now.
Thanks ..
NOT WORKING
FLASH FAIL EVERYTIME
PLZZZ HELP
Ola amigo tenho J8 SM-810M Android 9 pie conswgui fazer root no android 9 entao quando instalo o twrp via odin ta td certo escreve pass mais inves de entra no twrp entra no modo recuperação original do celular é só flashar no odin ou precisa fazer algo mais ?
Link not working
Link is not working