Enable Galaxy S9 Developer Options [+10 Useful Tricks]
Getting into the intense features of Android OS could help users to attain exhilarate productivity and improvement opportunities. This is the most definitive guide that helps to enable/activate the Developer Options on Samsung Galaxy S9 and S9 Plus smartphones and use it effectively for multiple enhancements. You can be sure that it is going to amaze you in different ways.
Tweaking the smartphone has become easier and within the grasp of ordinary users like us. There is no need to achieve root either. There are many tweaks that can be applied to the Android phone. The Developer Options has been intentionally developed for Android Developers. This helps them test and review apps, features and other developments.
For users like us, the Developer Options have plenty of useful features. So, while we get around this menu, we’ll more likely to discuss their uses, and benefits that users could get. First of all, you gotta enable this Developer Options menu on your Samsung Galaxy S9 smartphone.
Almost all OEMs keep this menu hidden from the users. Although, this menu won’t hurt your phone. However, it is suggested that you shouldn’t use the Developer Options unknowingly rather use it more precisely for the specific purpose.
This menu is supposed to be used by the Android Developers, thus OEMs keep this menu hidden from the users. We can easily enable this menu on most of the Android phones including the Samsung Galaxy S9. There’s a certain method that you gotta follow to obtain this menu on your phone. You should not worry about the warranty or anything else.
Also see:
Accessing and using this menu won’t void the warranty. Using the Developer Options on Galaxy S9 is completely safe and won’t cause any issues. The user can anytime activate/deactivate this feature anytime they want.
This menu has plenty of useful features that should enhance your experience. Once we enable this option, you can control animations, keep an eye on running services, limit background press, fake your location, choose the default USB configuration, enable OEM unlock, USB Debugging and a few more options. If you’re anything concerned about the performance, then you must check our recent checklist on improving performance on Galaxy Note 8, you can apply them on Galaxy S9 too.
Most commonly, people use this menu to enable the USB Debugging feature that allows the user to establish a connection between the Android Debugging tool and the phone. Or with any other Android tool (like Odin). However, there are lots more things we could do using this menu.
Through this guide, we discuss some important uses of the Developer Options to enhance the user experience, and somewhat improve the productivity of this smartphone. Without ado, we should go further and enable the Developer Options on Samsung Galaxy S9 smartphone.
How to Enable Developer Options on Samsung Galaxy S9
The steps are quite to follow and apply. These steps remain the same for most of the Samsung smartphones. The following instructions shall let you enable the Developer Options on Samsung Galaxy S9:
- Tap on the Settings icon on your phone.
- Then, scroll down and tap on About Phone option and tap on it.
- Now, tap on Software Information.
- Then, locate Build Number and tap 7 times on it.
- That will activate the Developer Options on your phone and you can access it through Settings->Developer Options.
That’s it, now you can access this menu from Settings directly:

Now, you can easily access this menu and use this wisely. Since we have enabled this option, now we can proceed further and enable other options like USB Debugging, animations, etc.
Though this menu won’t harm your phone in any manner, we still recommend you to use this mode carefully. You must not associate with it unknowingly.
Best Developer Options tips and tricks for Samsung Galaxy S9
Now, we will discuss some important things we could do using the Developer Options. We hope that our users would like these tips and tricks. Here are the best things you could do on your phone:

1. Enable USB Debugging
The Developer Options is primarily used to enable this option. Without it, we cannot form a connection between mobile and the Android tools like ADB, Odin and other flashing tools. If you’re indulged with the firmware update process or something similar, then you must have this option activated.
The following instructions are set to enable this option:
- Tap on the Settings menu.
- Tap on Developer Options.
- Now, locate ‘USB Debugging’ and tap on it. That will enable this menu.
- Exit the menu.
Now, go and connect your phone to the computer. That utility should detect them and proceed with that action you’re intended to perform.

2. Control animations for performance sake
There is no doubt that Samsung Galaxy S9 is a powerhouse, however, what if we could add some more fluidity to it. The Developer Options allows users to control animations extent and durations, both.
Therefore, if we reduce both, it quickly speeds up the performance of the device. And actually, it happens. As we lower the extent and duration of animations, it loads off some pressure from the processors. It makes actions happen quickly and improves response time. Just follow the below steps:
- Open the Settings menu.
- Open the Developer Options.
- Now, look for “Windows Animation Scale”, “Transition Animation scale” and “Animator duration scale”.
- Tap on each entity and change the default value to 0.5X.
- Exit this menu.
We reduce the default animation settings to half, that reduces the response-time to half. That significantly improves the performance.
3. Customize DPI Value
Another aspect that improves performance and makes actions feel smoother. The term DPI is linked with the size of the on-screen content like text, icons, objects, and similar things. It directly controls the size of the on-screen content.
The phenomena go simple, for bigger objects, less the amount of rendering power is required as compared to small-complex objects. So, we adjust the DPI value in such a manner that it won’t make icons/texts look weird while it improves the performance. Or you could find the best settings that suit well to your phone.
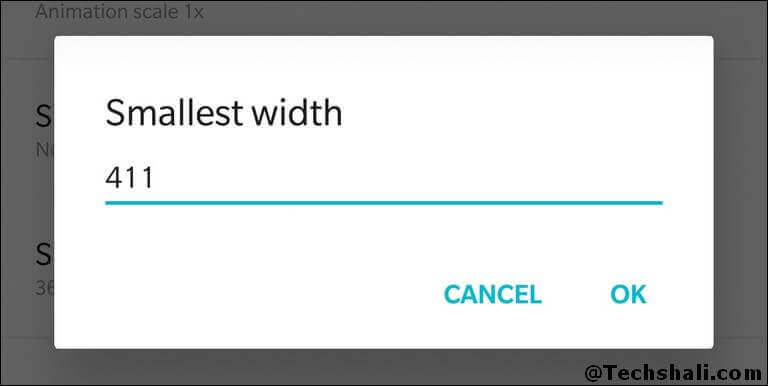
- Open the Developer Options.
- Now, look for ‘minimum width’ or ‘smallest width’ option.
- Change the default value to 360.
- Exit this page.
Remember, lowering the DPI value will increase the size of On-Screen content and vice versa. While you change the DPI value, you may find the Samsung launcher is not adapting to these changes correctly. If that happens, we suggest you switch to other launcher apps like Google Pixel or find more in the below list:
4. Fake location on Samsung Galaxy S9
Many people wouldn’t know that we can generate the fake on our phone. Means, we can force our phone to imitate the wrong location. In order to do that, you gotta use some sort fake location application or use this one.
Such applications work only when you select that app under ‘Select Mock location app’ under the Developer Options. So in that case, you gotta use the Developer Options.
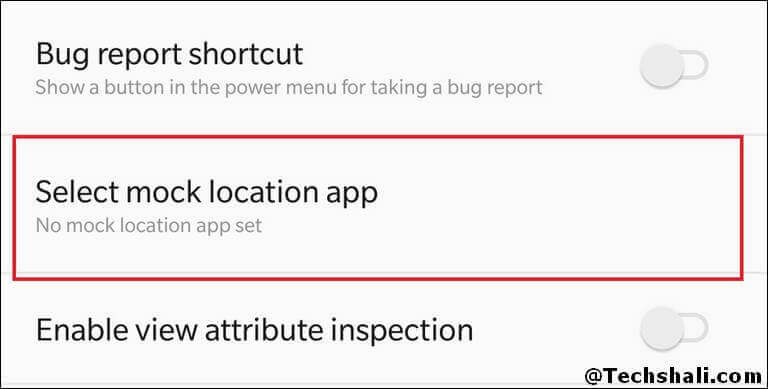
- Again, open the Developer Options.
- Then, look for the Select mock location app and tap on it.
- Select the fake location app.
Now, you can generate a fake location through the application to imitate fake location.

5. Enable Force GPU Render
We assume that all rendering/graphic related work is handled by the dedicated GPU chip. However, that assumption is not correct. In our smartphones, most of the UI part is rendered using the processors. The GPU chip specifically intervenes while we play games and use applications that graphically dense.
That keeps our processor busy most of the time. Thus, if we switch this rendering task to GPU chip, that would free the processor from being busy and that resource could be used for other tasks. That improves the overall performance of the phone.
- Open the Settings.
- Tap on the Developer Options.
- Locate ‘Force GPU Rendering’ and enable this option.
You should observe the difference.
6. Improve Bluetooth music/audio quality
If you listen to the music over Bluetooth headsets quite often then you’re going to love this tip. The Android Oreo version adds different Bluetooth audio codecs that improve quality, and strength of the connection. For enhanced audio/music quality, we would suggest you use the HD codec.
Remember, it works only with Bluetooth headsets and similar devices. It doesn’t work on wire earphones. Just follow the below instructions to improve the audio quality on your phone.
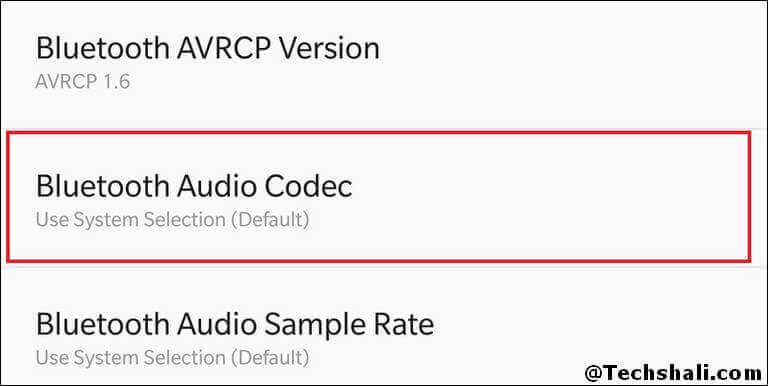
- Open the Settings menu.
- Tap on Developer Options.
- Look for ‘Bluetooth Audio Codec’ and select the desired codec.
- Exit the menu.
Now, re-connect your Bluetooth headsets to experience the better quality. If you’re looking to improve the speaker volume on your phone, then the following guide is what you need:
7. Set Default USB configuration
Do you notice that each time we connect our phone to the computer, it asks to choose the USB configuration? We can set this configuration with the default option. Like, if you frequently connect your phone to the computer to transfer files, then you can make this option default.
So, next time when you connect, it won’t ask you to choose the USB configuration. Isn’t that useful? Of course it, just follow the below steps to set the default USB configuration on your phone.
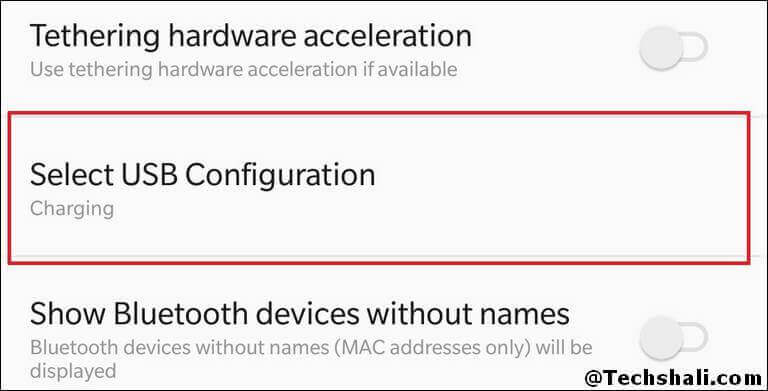
- Open the Developer Options.
- Look for ‘Select USB Configuration’
- Tap on it and select the required USB configuration.
That’s it. Now, going forward you don’t need to select this mode manually.
8. Set SD Card as the default installation path for apps/games
You don’t need to root or mod your Galaxy S9 fully to do most of the advanced tasks. We can implement many of them using the Developer Options. I remember the time when users have to root their phones to move apps to the SD card/memory card.
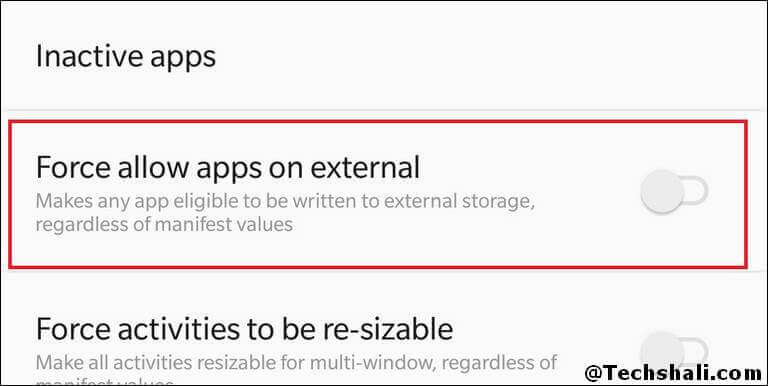
If you have the same intentions, you could do this by just enabling the ‘Force allow apps on external’ option present within the Developer Options.
- Open the Developer Options.
- Look for ‘Force allow apps on external’ and enable this app.
- Exit and reboot your phone.
Now, going forward, the apps and games would install on the SD card instead of using the internal memory.
9. Track background running services
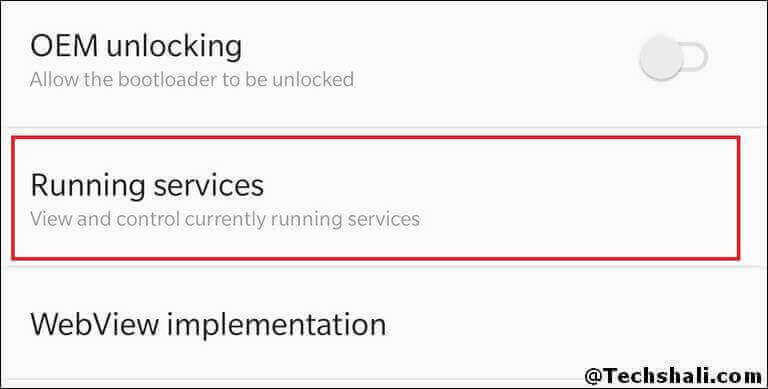
If you want to get more insights into the running processes on your phone you can go advanced through Developer Options. Using the Running services menu, you can thoroughly investigate apps that are running the background (that keep running) and block them as well.
Sometimes it happens, we find some unusual behavior on our phone and suspect that some apps/services might cause that issue. In such a case, you must use this menu to locate that app and close it.
- Open the Settings menu.
- Now, tap on the Developer Options.
- Then, tap on ‘Running services’.
- Now locate the app that might cause the problem and stop it to see if that works.
Even there are different ways to troubleshoot such problems on Samsung Galaxy smartphones.
10. Switch to OpenGL Skia renderer
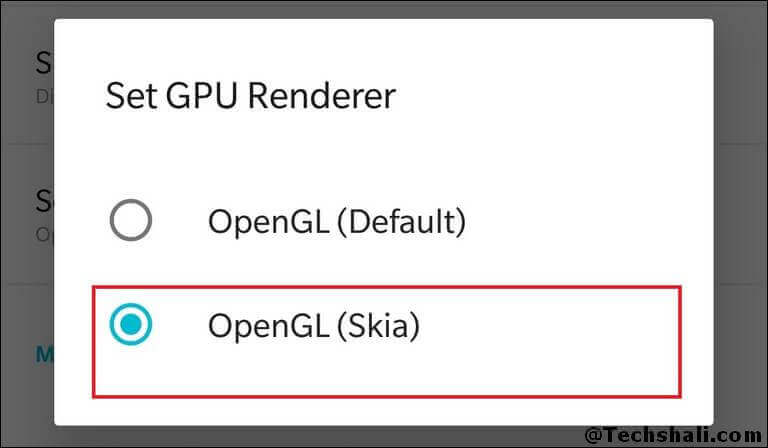
The Android Oreo allows users to switch between different GPU Renderer engine From some researches, we have found that OpenGL Skia works somewhat better than the default OpenGL renderer. So, we suggest you to switch to this renderer for better graphics quality and performance.
- Just open the Settings.
- Tap on Developer Options.
- Now, look for ‘Set GPU Renderer’
- Select Open GL (Skia).
- Exit and reboot your phone.
That will enhance the overall performance. Mostly, enhancements have been observed while graphically dense games. So, you can expect improvements in gaming.
That ends our list of best Developer Options tips and tricks for Samsung Galaxy S9 and S9 Plus smartphones. We hope that our readers would like these tips and tricks. If you have something to share, do let us know through your comments.
![Check These Latest Apps for Your Android Device [2019]](https://techshali.com/wp-content/uploads/2019/07/latest-android-apps.jpg)