How to Enable Developer Options on Moto G6 [+Performance Tips]
The Moto G6 runs on the latest Android firmware that creates some differences while performing some operations. For example, the steps we require to enable the Developer Options are different than what we usually follow. For that purpose, we brought this tutorial for Moto G6 series smartphones users. In this tutorial, we’ll help you to enable the Developer Options/USB Debugging on Moto G6 smartphones. Enabling this option unlocks some different ways to customize the Android UI bringing enhancements. With this option, you can improve the general performance on your phone.
The Developer Options can help you make your phone perform better in terms of productivity. There are several options come very helpful. Most of the time we approach the Developer Options just to enable the USB Debugging option. Whereas, there are some more set of features. If used correctly, can improve the Android experience without hurting your phone. The Developer Options is something that every OEMs put in their phone. But for some reasons, they keep it hidden/away from the users. Through this tutorial, we’ll help you to activate the Developer’s mode on your Moto G6 smartphone.
We outline all the required steps to enable the Developer options on your phone. Along with that, we’ll also discuss some important usage of this mode. Through this menu, users can improve the productivity and usefulness of the smartphone. This mode is implanted with the intention to help the Android Developers. This mode helps them test new developments and bring new stuff for Android software. For ordinary users like us, it is almost like a peace of mind. Through this menu, you can access animations settings, DPI, USB configuration, OEM unlocks settings, and do much more. Even you can set the 2d graphics to be rendered through the hardware. Also, you need this option when you →perform root option on your Moto G6.
This is the only official tool that helps to improve the Android software without voiding the warranty. Neither it affects your phone in any way. However, you shouldn’t use this menu carelessly. You should only use those options that we mention in this guide. Or you might some uncertain problems if you use it unknowingly. Further, there are no prerequisites to adhere. Enabling the Developer Options is completely safe and won’t impact the manufacturer’s terms and condition. You can go ahead and enable options on your phone any time you want. If you ever wish to customize your phone, then you must start by using this menu.
How to Enable Developer Options on Moto G6
On Moto G6 series smartphones, you cannot follow the steps that we used to use. The newer Android UI has brought some changes. So, follow the below instructions to enable the Developer Options on Moto G6, G6 Plus, and G6 Play:
- Open the ‘Settings’ menu on your phone.
- Now, scroll down and tap on ‘System’ entity.
- Next, tap on the ‘About Phone’ menu present at the bottom of the screen.
- Then, locate the Build Number.
- Now, tap 7 times on Build Number to activate the Developer Options.
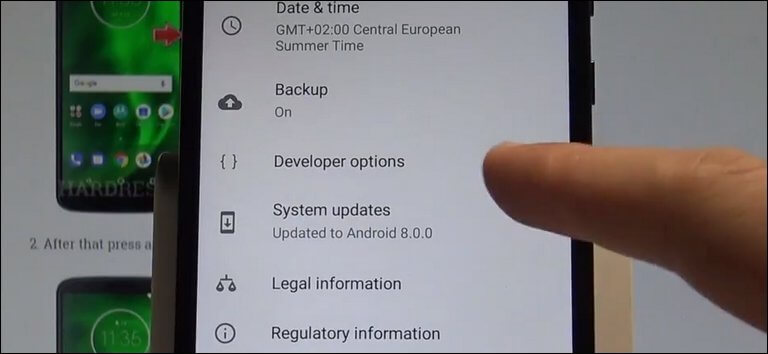
- The Developer Options will be activated and added to ‘System’ menu like below:
Now, you can access the Developer Options from Settings->System->Developer Options anytime you want.
That is the way to activate the Developer Options on Moto G6 smartphones. Now, you’re free to go further and access the available options. To make this tutorial more meaningful for you, we gather some useful things you can on your phone using this menu.
Now, we will discuss some important use of Developer Options on Moto G6 series smartphones.
Things you can do with Developer Options
1. Enable USB Debugging
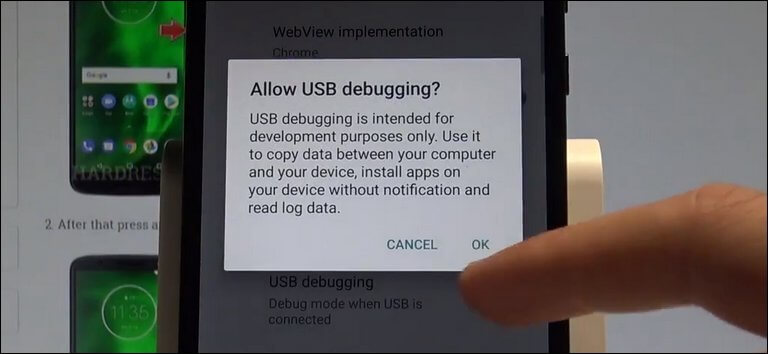
Being the most common task we usually do after activating the Developer Options, the USB Debugging is important for many operations. Whether you want to install TWRP recovery or put stock firmware, this option is mandatory. If you wish to install TWRP recovery then must follow our guide on how to →install TWRP recovery on Moto G6 and G6 Plus.
Follow the below instructions to enable USB Debugging on your phone:
- Open the Settings->System on your phone.
- Then, tap on Developer Options.
- Next, locate the USB Debugging and enable it. Give your confirmation.
- Exit the menu.
2. Enable OEM Unlocking
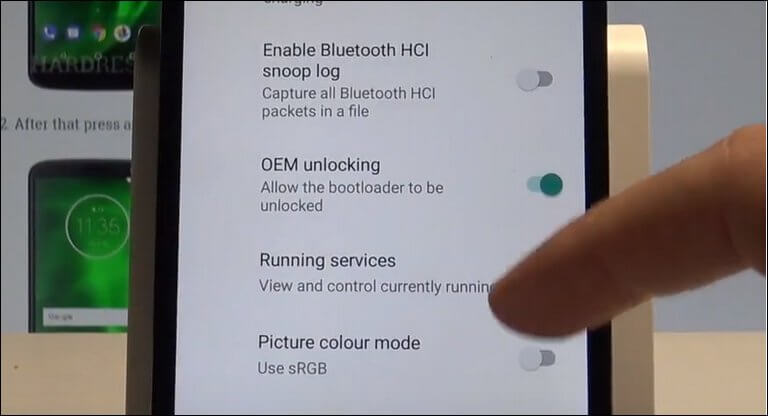
You require this when you want to unlock the bootloader of your phone. Means, to start some custom operations on your phone, you must enable this option. The following instructions will help you to access this option and enable it:
- Open the Settings.
- Then tap on System.
- Next, open the Developer Options.
- Now, scroll down and locate ‘OEM Unlock’.
- Tap on this option to enable it.
- Exit the menu.
Must see: How to unlock the bootloader on Moto G6 and G6 Plus
3. Change DPI Value (Improve performance)
DPI, this term is related to the size of the on-screen content. If you ever wish to improve the performance of your Moto G6, then you must make use this thing, By reducing the DPI from the default one, you reduced the stress from the processor to render small and complex things. The below steps you need to enable this option:
- Tap on the Settings->System on your phone.
- Then, Open the Developer Options.
- Under this menu, look for “Smallest width” or “Minimum Width” and tap on it.
- Now reduce the default value.
- Exit the menu.
The recommended settings DPI to achieve better performance is 320 or 340. Try putting these values to improve smoothness and performance.
4. Reduce animations (Improves performance)
This is the sure-shot way to improve performance on Android phones. The Animations are trigger all around the Android UI, of course, they consume some power resource. Thus, it is a good idea to cut-off them to some extent.
Just follow steps to limit the animations on your phone for better performance:
- Open the Developer Options.
- “Windows Animation Scale”, “Transition Animation scale” and “Animator duration scale”.
- Set 0.5X value to each of them.
- Exit the menu.
5. Select USB Configuration
It is going to save your time. Everytime we connect our phone to computer, it asks you to choose the USB configuration. This way, you can set your preferences. Thus, it gets connected directly without asking you for the same.
- Open the Developer Options your phone.
- Then, look for USB configuration.
- Select the requires connection type.
- Now exit the menu.
That ends our tutorial here. Now, you should be able to enable the Developer Options on your Moto G6 smartphone and enjoy other available features. Don’t forget to miss our exclusive →list of best apps for Moto G6 smartphones.
We hope that our readers would find it helpful. If you do, please let us know us through your comments. You’re most welcome to make comments. We are happy to hear from you and improve our tutorials.


I will never buy another Motorola Product again, finally am able to normally connect my MotoG to download pictures over USB. Poor Engineering from Motorola’s part. Every other Android functions normally when connecting a USB Cable, only Motorola does not.
i wont but motorola mobile ever again in life