How to repair / unbrick Samsung Galaxy J7 Prime 2 with stock firmware
The Samsung Galaxy J7 Prime 2 is a result of its descendants. The Galaxy J7 Prime was one of the most popular smartphones in the past years. The Samsung has launched this smartphone with the same intention. Launched in Mar’18, it has been sold very well so far. There would be many people who have started customizing it and some of them might have ended bricking their phone. If that’s your case, then this tutorial is going to help you a lot. In this tutorial, we’ll help you to repair/unbrick the Samsung Galaxy J7 Prime 2 using the official stock firmware to restore it. And make work again like before.
Flashing the stock firmware restores all stock aspects on the phone and brings it back to a working state. For Samsung smartphones, it is quite easier to get an official firmware and flash it on the phone right away. While there many reasons that could have bricked, so there are different troubleshooting solutions as well. For soft brick and stability/performance related issues, we suggest our users perform some resets. They might or might not work in bringing back your phone bricked and malfunctioned condition. Whereas, flashing the stock firmware is sure shot solution to repair /unbrick the dead and bricked Samsung Galaxy J7 Prime 2 smartphone.
If you’re running short in performance or facing some common issues, you should try some basic troubleshooting guides. We suggest you reset your Samsung smartphone. That helps to cure most of the problems. Otherwise, keep reading this tutorial. Basically, when we flash the stock firmware, it replaces all the custom aspects with stock aspects leaving no problems. It replaces all affected parts and replaces them with new ones. Thus, stock firmware helps to cure major problems. Until the problem is with Android software, we can manage to remove it. But if that’s not the case, or you’ve somehow damaged it physically, then you must take it to the service center.
This is the definitive guide to unbrick your Galaxy J7 Prime 2 smartphone. We will use the Odin flashing tool to flash the stock firmware on your phone. Basically, the Odin tool is specially built software update tool for Samsung smartphones. It helps to update firmware and flash different firmware image on phones. You must know that proceeding further will wipe out the phone’s memory. If there’s anything stored on your phone, it will be deleted. Thus, we recommend you to back up your important stuff before proceeding further. You can follow our guide: backup Samsung smartphones. That would be a much safer way to proceed further.
The most noteworthy thing is that this process is completely safe and official one. If you’ve somehow voided the warranty, the following this tutorial will restore your phone along with the warranty. Basically, it will replace all the custom aspects that void warranty with the stock things. Thus, you get your warranty back, and everything restored to work properly. If you’re using a custom firmware or recovery, then those will be replaced with stock firmware and recovery.
Before we begin with the procedure, make sure to read below prerequisites thoroughly.
Prerequisites
- We dedicate this guide and files mentioned to Samsung Galaxy J7 Prime 2. And of course, you shouldn’t use them on any other smartphone. That can make things even weird. Make sure to check your device model number before you step further.
- As we have already discussed, this process will wipe the device’s internal memory. Therefore, a general backup is highly recommended. If there’s any chance of creating a backup, you must have it.
- You must know that all custom aspects and settings are flushed and stock aspects will take the place of them. If you’re using a custom ROM/recovery, they all will be replaced with the stock ones. That should remove all of your custom settings as well.
- To complete this operation, you need a Windows-based computer, laptop/desktop. And the official USB cable of your phone so we connect your phone to the computer.
- You must enable the USB Debugging on your phone. That is essential as we are about establishing a connection with the phone and computer. Follow our guide: Enable USB Debugging on Samsung Galaxy phone.
- Must check the battery status of your phone. Anything below the 50% is not suitable for this process. It shouldn’t die while we execute this operation.
Downloads
- Get the official stock firmware on your phone from →here. You can download the firmware using the device model number. Check the model number by tapping on Settings->Software Information->About Phone->Device Model.
- After you download the firmware file, extract the content to obtain firmware file having extension .md5.
- To flash this firmware, download the Odin tool from →here.
- Extract the content to get the executable Odin program.
- At last, get the Samsung USB Drivers from →here. Install them on your computer, so your phone can be detected by the computer.
How to flash stock firmware on Samsung Galaxy J7 Prime 2
- First, power off your phone.
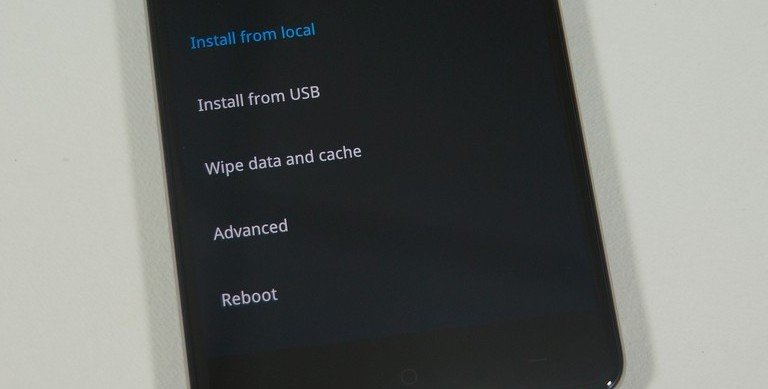
- Now, get into the download mode – press and hold Volum Down, Home and Power buttons together. Release all the buttons once Samsung logo appears. You’re should reach into Download mode soon.
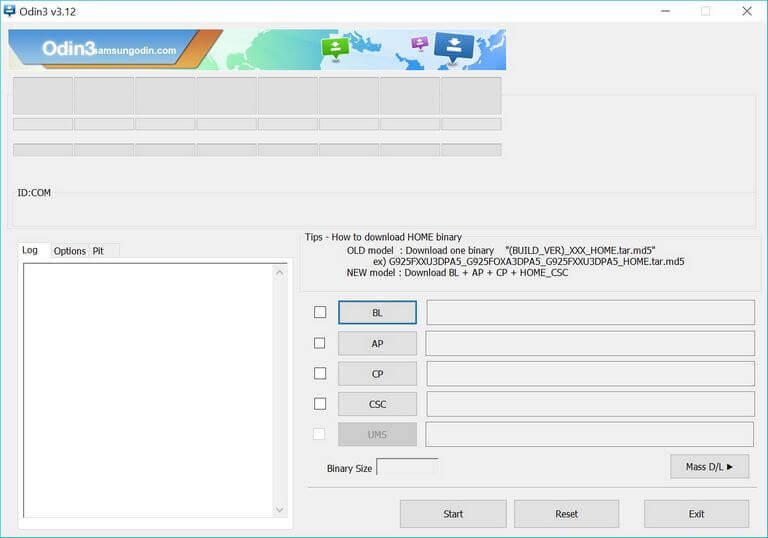
- On your computer, run the Odin program, this tool looks like this:

- Now, connect your phone to your computer. The Odin tool will detect your phone automatically. If it doesn’t just install the USB drivers and try again.
- Next, tap ‘AP’ button and load the firmware file having .md5 extension.
- Then tap on the ‘Start’ button to begin the process.
- Once it is completed, take off your phone.
That’s it. You’ve flashed the stock firmware on your phone successfully. For the very first boot up, your phone might take several minutes. Soon, it will take you to the home screen. There, enter your Google account details to start using this smartphone, just like before.
That concludes our guide on to unbrick the Samsung Galaxy J7 Prime 2 through stock firmware. This should remove all the bugs, problems and issues with your phone. Share your thoughts and views in the comment section below.