Reinstall/Repair Windows 11 25H2 Without Losing Files Using the Assistant
If your Windows 11 25H2 PC is acting up, you can reinstall it without wiping your files. The same Windows 11 Installation Assistant that upgrades PCs also repairs an already-installed 25H2 system. I re-ran it on a glitchy test PC and kept all the files.
This guide shows you how to use the Assistant as a repair tool. You’ll see the exact steps I used, plus the limits you should know first. If you’re on an ARM PC, you may want to read the note near the end before you start.
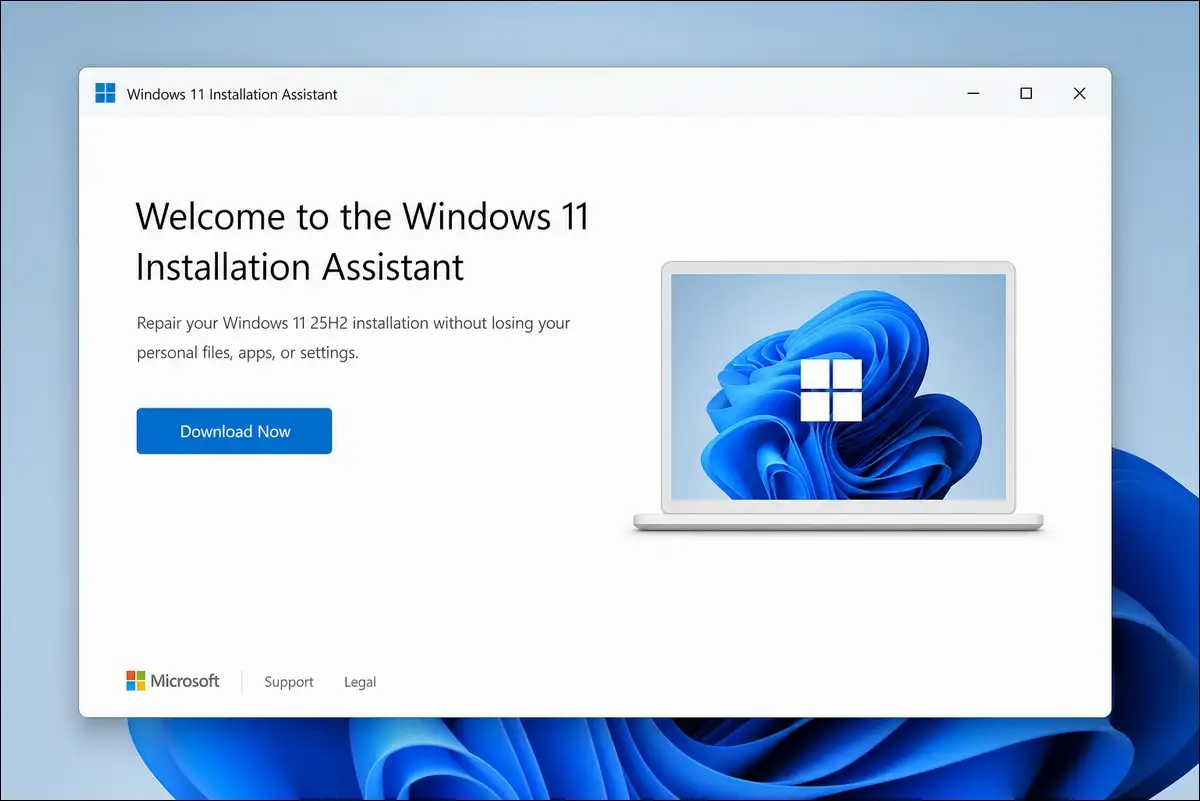
Key Insights
The Windows 11 Installation Assistant isn’t just for upgrades. You can re-run it on a 25H2 PC to repair a broken install while keeping your data.
- The Assistant can act as a repair tool for an already-upgraded 25H2 system. Re-running it reinstalls Windows while preserving files.
- This can fix issues like corrupted system files without a clean wipe.
- 25H2 is the current shipping version (released Sep 30, 2025), so the repair targets this build.
- The Assistant is x64 only. On ARM or Snapdragon PCs, you can’t use it, so Windows Update or the ISO is the path.
- A repair reinstall keeps files, apps, and most settings, unlike a clean install from USB.
- A full backup is still smart before any reinstall, even a file-safe one.
Also read: Fix Windows 11 Installation Assistant Not Working
When a repair reinstall makes sense
Most “reinstall Windows 11” guides jump straight to a clean USB install. Leading with a repair first is the gentler, faster path, and it keeps your stuff.
Symptoms: a repair reinstall can fix
You may see corrupted system files, a broken Windows Update, or random crashes. These are cases where the PC boots but feels unhealthy.
Repair vs clean install (the key difference)
A repair keeps your files, apps, and settings, while a clean install removes everything. You’d pick repair when you want the PC healthy, not empty.
Why use the Assistant instead of an ISO
The Assistant guides you and checks your hardware for you. The ISO needs mounting and manual steps, so the Assistant is simpler for most people who just want a fix.
What you need before you start
The repair path uses the same preconditions as a first upgrade. I’ve framed them here for a repair, since a few details differ once Windows is already installed.
The x64-only rule still applies
ARM and Snapdragon PCs can’t run the Assistant at all. You may want to use Windows Update or the ISO instead, since the block there is by design.
Disk space and license
Keep 9 GB free, which is the minimum Microsoft states for the Assistant. A valid license should already be active, and a repair won’t change your activation.
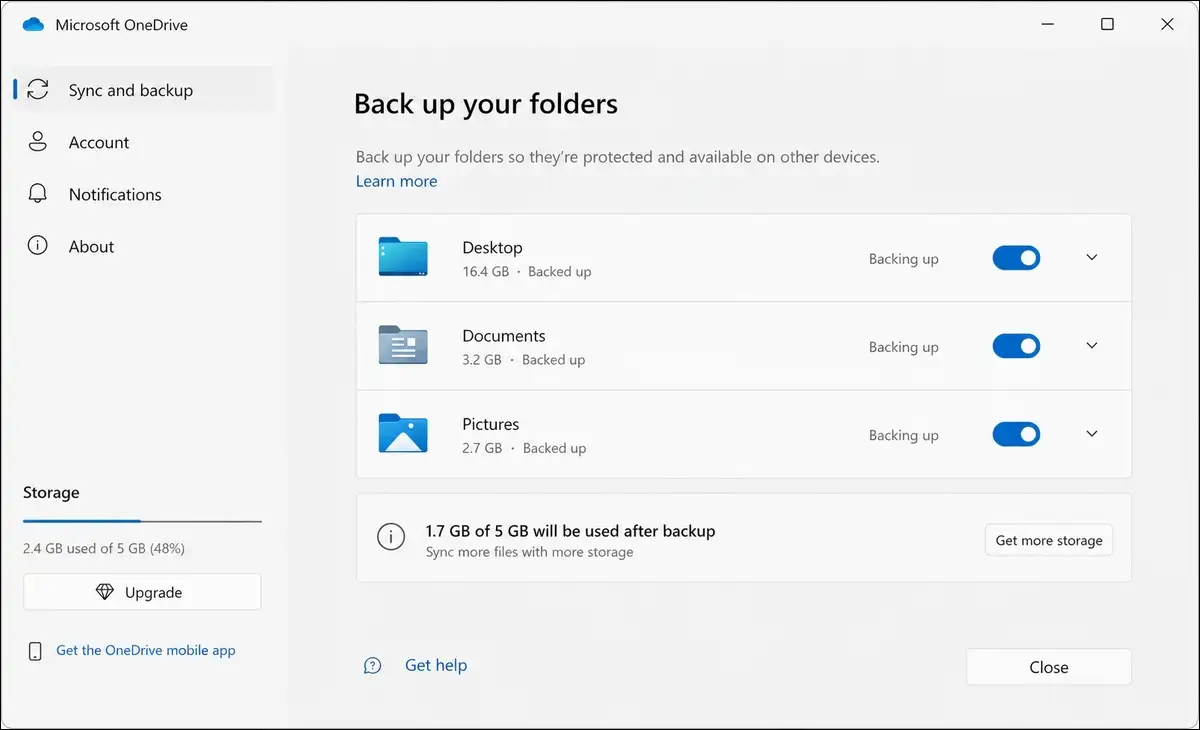
Back up first (tested best practice)
I used a OneDrive folder backup before re-running the Assistant. It took five minutes and removed all worry, so you can do the same before you begin.
How to repair or reinstall 25H2 with the Assistant
Here’s the tested walkthrough for re-running the Assistant on an existing 25H2 PC. Follow it in order and keep your machine plugged into the power.
Download the latest 25H2 Assistant
Get Windows11InstallationAssistant.exe from the official Microsoft page. The 25H2-tagged build is the one you want for a 25H2 repair.
Run it as administrator
Right-click the file and choose Run as administrator. The tool re-checks compatibility even on a PC that already runs Windows 11.
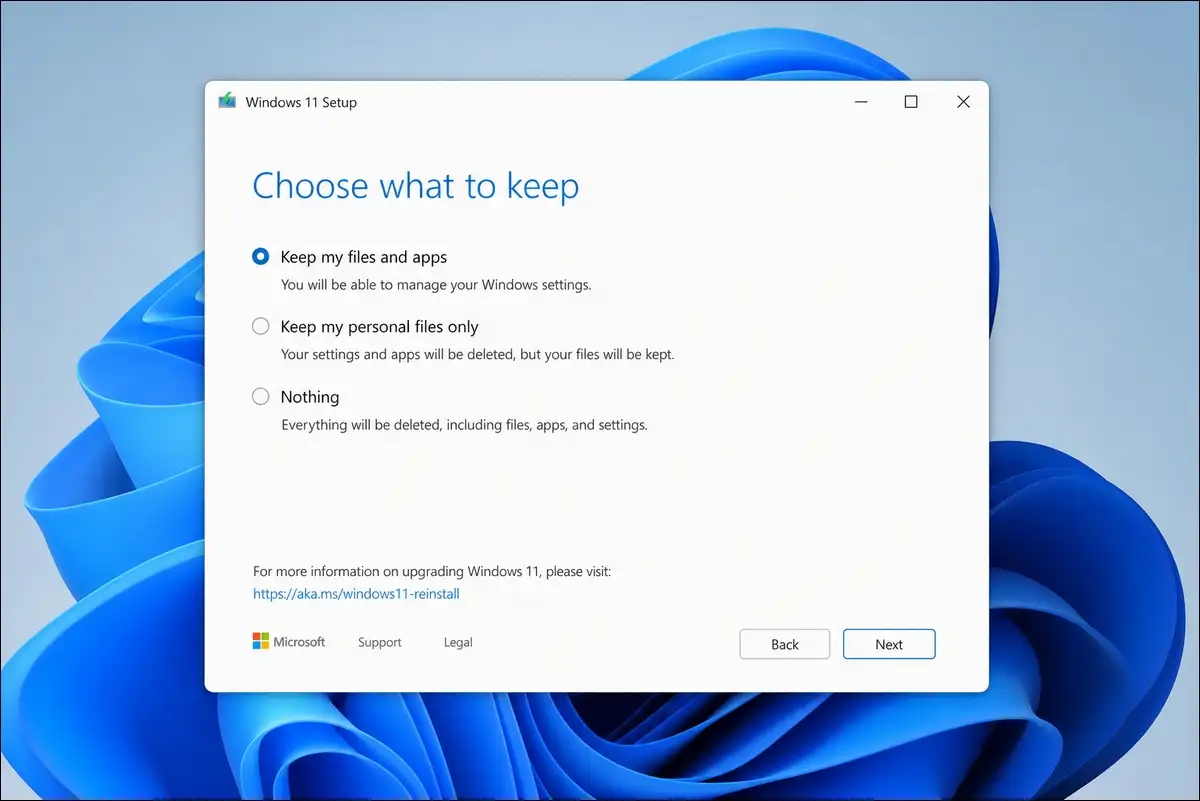
Choose to keep your files and apps
Accept the license, then pick the keep-everything option. This single choice is what makes the run a repair, not a wipe.
Let it reinstall and reboot
The Assistant downloads 25H2 again and reinstalls it in place. Your PC reboots a few times, and you shouldn’t turn it off during that.
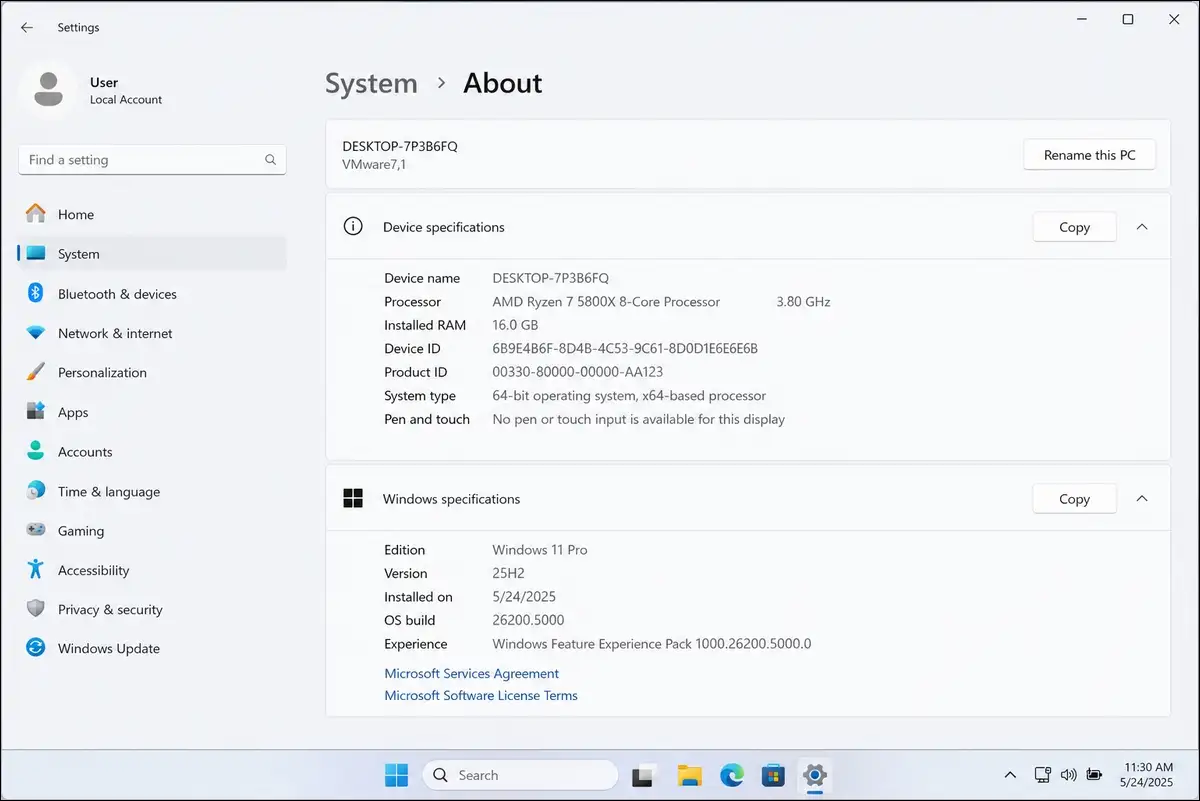
Verify the result
Sign in, open Settings, and confirm that the build number is 26200 or higher. You can then check Windows Update for any post-repair cumulative patches.
What a repair reinstall fixed on my test PC
This is the part I wanted to prove with my own machine. A repair reinstall isn’t just theory when the Assistant does the work.
The problem I saw
One test PC had corrupted system files and a Windows Update that wouldn’t finish. It booted, but it felt broken and slow in daily use.
What changed after the repair
My files and apps stayed put, the update started working, and the crashes stopped. The reinstall behaved like a clean refresh without the data loss.
Common repair issues and quick fixes
You may hit a snag during a repair, and that’s okay. I’ve reused the 2026 error knowledge here, reframed for the repair scenario.
Error 0xc004f015 during repair
This is often a corrupted activation database. You can fix it with slmgr /upk, then /ckms, then /rearm, and a restart.
Stuck or slow reinstall
Free 20 to 25 GB of space first. You may also pause your antivirus and reset the Windows Update components if the progress won’t move.
Assistant won’t open on Arm
That’s by design, since the Assistant is x64 only. You can use Windows Update or mount the official ISO to repair instead.
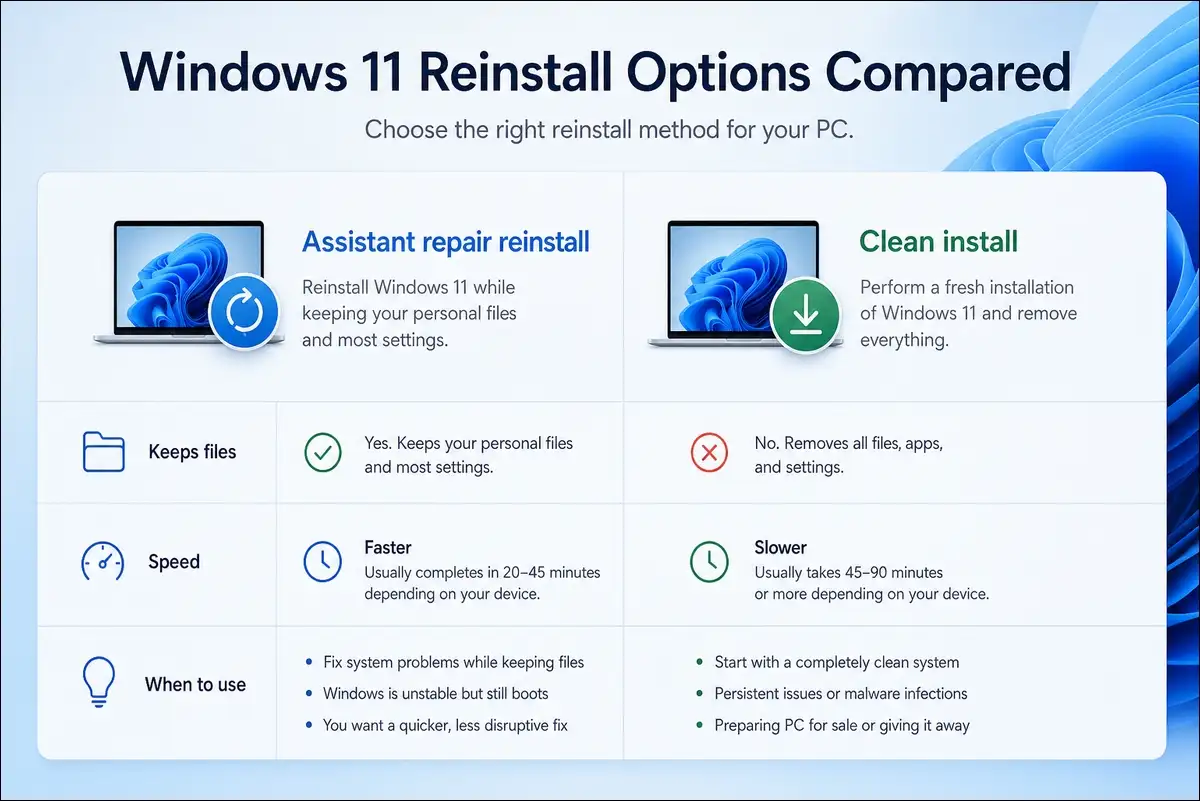
When a repair isn’t enough (clean install path)
Sometimes a repair just won’t take, and that’s fine too. You have an official next step that’s safer once you’ve backed up.
Signs you need a clean install
You may see a deep driver or disk failure, or the repair loops never finish. Those are the cues that a wipe is the better call.
Do a clean install the safe way
Back up fully first, then use the Media Creation Tool or the ISO. You can restore your files afterward, but a clean install removes them during the process.
Frequently asked questions
No. The repair keeps your files, apps, and settings, since you choose the keep-everything option. A clean install is the only path that removes data.
Yes. The Assistant repairs in place, so you won’t need a USB stick or any bootable media at all.
It can. On my test PC, corrupted files and a stuck Windows Update were resolved after the repair reinstall finished.
Yes. It’s a free official Microsoft tool, and you’ll only need a valid Windows license that’s already active.
No, not the Assistant, since it’s x64 only. You may want to use Windows Update or the official ISO on those devices.
Wrapping Up!
The Windows 11 Installation Assistant isn’t just an upgrade tool. On an already-upgraded 25H2 PC, re-running it performs a file-safe repair that can fix corrupted files and broken updates.
I tested it on a glitchy machine and kept every file. Back up first, run as administrator, and keep 9 GB free. If you’re on an ARM PC, the Assistant won’t run, so use Windows Update or the ISO.
When a repair isn’t enough, a clean install is your next step. Start with the repair, though, since it’s faster and keeps your stuff.


![Why headset doesn't work on computer [Fixed]](https://techshali.com/wp-content/uploads/2022/03/headset-doesnt-work-on-computer-390x220.jpg)