How To Enable Classic Context Menu In Windows 11
This step-by-step guide details how to enable the classic context menu in Windows 11 using the system tools or using a free third-party program.
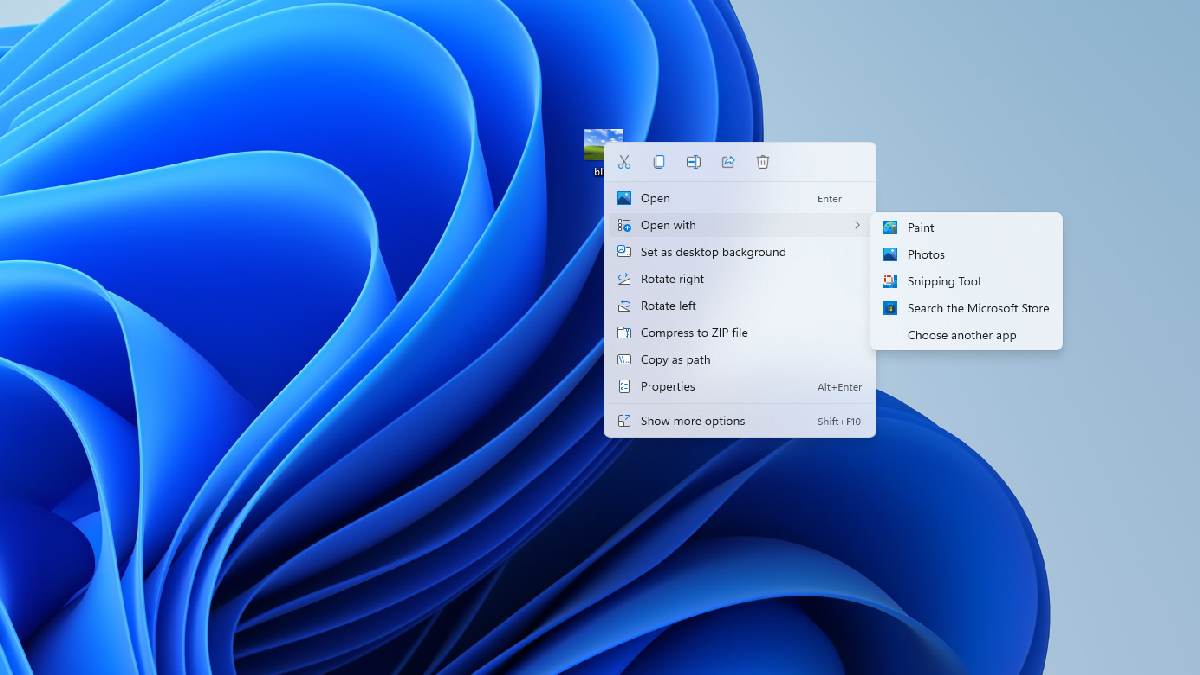
In Windows 11, context menus when right-clicking on files or folders have acquired a new design and a different set of available actions. The display of the old context menu remained available by clicking on the “Show advanced options” item or by pressing the Shift + F10 key combination. However, you can enable the old context menu to always open by default by right-clicking on a desktop or explorer item.
Enabling the old Windows 11 context menu using Registry Editor
The first way to disable the new context menu and leave only the “classic” is to use the Registry Editor. To do this, follow these steps:
- Press Win + R keys or right-click on the Start button and select Run, type regedit and press Enter.
- In the Registry Editor that opens, go to the section
- HKEY_CURRENT_USER \ Software \ Classes \ CLSID
- Check if there is a subsection in this section named
- {86ca1aa0-34aa-4e8b-a509-50c905bae2a2}
- If not, create it: right-click on the section CLSID – New – Section and set the specified name.
- Inside the created section, create another subsection named InprocServer32
- Go to the created section InprocServer32 (select it in the left pane of the registry editor), double-click on the “Default” value, and then, without changing the value, click “OK”.
Done, from now on, right-clicking on the elements of the Windows 11 explorer and desktop will open the old context menus. If this did not happen automatically, restart Explorer (you can do it through the task manager), or restart your computer.
Instead of manually editing the registry, you can create a reg file with the following content and add it to the registry:
Windows Registry Editor Version 5.00

[HKEY_CURRENT_USER \ Software \ Classes \ CLSID \ {86ca1aa0-34aa-4e8b-a509-50c905bae2a2} \ InprocServer32]

@ = ""
Another option is to use the command line running as administrator and the command:
reg.exe add "HKCU \ Software \ Classes \ CLSID \ {86ca1aa0-34aa-4e8b-a509-50c905bae2a2} \ InprocServer32" / fIf in the future you want to return the normal Windows 11 context menu, simply delete the registry key {86ca1aa0-34aa-4e8b-a509-50c905bae2a2} under
HKEY_CURRENT_USER \ Software \ Classes \ CLSID
Attention: when using the described methods, it is possible to reset the desktop wallpaper and change the distance between the desktop icons, usually a simple computer restart solves the problem.
Must see:
- How To Disable /Uninstall Widgets In Windows 11
- How to remove bloatware/ unwanted apps from Windows 11
Free Windows 11 Classic Context Menu
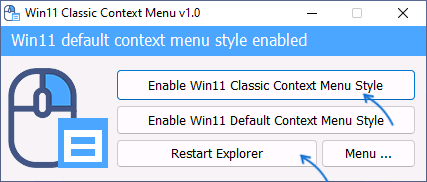
Another easy way to quickly return to the default context menu in Windows 11 is the free Windows 11 Classic Context Menu utility:
- Download the utility from the developer’s official website (the download button is at the bottom of the page), unpack the archive and run the program.
- When the SmartScreen filter is triggered, click Details and then Run Anyway.
- Click “Enable Win11 Classic Context Menu Style” in the program.
- When the window turns green (a classic context menu is enabled), click “Restart Explorer” to restart the explorer.
As a result, Windows 11 context menus will take on a classic look. In the future, you can return to the original display option using the same program and the “Enable Win11 Default Context Menu Style” button.