Samsung Galaxy J6- Enable Developer Options/USB Debugging
Samsung constantly brings new innovations. Whether we would prefer a budget-friendly smartphone or an expensive flagship killer, Samsung won’t let you go elsewhere. Launched recently, the Samsung Galaxy J6 is beating the heat this summer. If you’ve purchased one for yourself, you’ve made a great choice. If you want to take extra controls and manage it properly, then you should aware your self with hidden features like Developer Options and USB Debugging. In this tutorial, we’ll help you to enable Developer Options and USB Debugging on Samsung Galaxy J6. That helps to manage this smartphone effectively and get access to hidden powerful features.
The Developer Options or Developer mode has a feature rich menu. Features that can help you to customize this phone smartly. This mode is supposed to be accessed by Android developers. Through this mode, they can test and examine new applications. For ordinary users, it looks no useful until you get to know about all of its features and how they work. In the guide, we’ll detail all the necessary steps to enable the Developer Mode on Samsung Galaxy J6, and learn how to access other features like USB Debugging, Animations and so on.
The USB Debugging can be enabled after we activate the Developer options. Google and other OEMs keep this menu hidden within the operating system. It can be accessed anytime. Most importantly, accessing this mode or using any of its features won’t impact the warranty of your phone. The warranty of your Samsung Galaxy J6 will remain intact. Neither they hurt your phone in any manner. If used correctly, the Developer Options can improve your experience on your phone drastically. Nonetheless, you shouldn’t use this mode carelessly. Otherwise, it can cause performance issues.
On another hand, the USB Debugging is an essential part of this mode. It is required when it comes to connecting the phone to the computer to perform certain actions. These actions include updating process, development purpose, connecting it to the PC suite and other tools. In simple terms, it helps in establishing a proper connection between the phone and computer. Therefore it becomes important to aware yourself with these modes and features. Sooner, or later you might want to access them.
How to Enable Developer Options Samsung Galaxy J6
The method is very simple and remains the same for most of the Samsung smartphones. Follow the below instructions to activate the Developer Options on Samsung Galaxy J6 and then we can enable the USB Debugging:
1. Tap on the Settings icons.
2. Scroll down to the bottom and tap on About Phone entity.

3. Now, look for Software information and tap on it.
4. Under this menu, locate the Build Number.
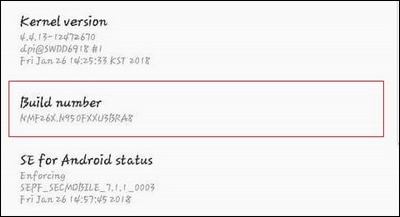
5. Tap Build Number Seven times to activate the Developer Options.
6. Now, you can access the Developer Options through the Settings menu.

That’s how we can activate the Developer Options on Samsung Galaxy J6 and other smartphones. Since we have this menu activated, now we can enable the USB Debugging and access other features.
Also see:
There is no harm in using the Developer mode. However, avoid using it carelessly or unknowingly. We suggest you learn about this mode and all its features before making an action. Use Google to search for it.
Now, let’s go further and cover the second part of this tutorial.
Enable USB Debugging on Samsung Galaxy J6
Now, we can proceed further enable USB Debugging entity. This option becomes mandatory while we update our phone manually, transfer files, connect it to a computer through PC suite and much more.
Follow the below instructions to enable this option:
- Tap on the Settings icon.
- Open the Developer Options listed at the bottom of the list.
- Under this menu, look for USB Debugging and tap on it:

- Give your confirmation to activate this option.
- Exit the Settings.

You’ve successfully enabled the USB Debugging on your phone. Now, you’re free to connect it to your computer, perform commands through ADB tool, manage it using PC suite or unlock it. It opens the door of opportunities that can improve the user experience to a greater extent.
If you’ve been looking to customize your phone, you might want to install custom recovery/ROM. Even for that, you’ll have to enable this option first.
So, you’re now aware of both, the Developer Options and USB Debugging. That ends our tutorial here on to enable Developer Options and USB Debugging on Samsung Galaxy J6 smartphone. Please them to make your experience better.
Don’t forget to share your thoughts and views in the comment section below. We’ll be glad to hear from you. Stay connected with us for more useful stuff.


It seems my J6 has OEM unlock disabled, i tried to reboot twrp recovery using Odin but the log shows: All threads completed. (Succeed0/failed1) Removed!!
Hope you can help me out. Thanks.
how to enable usb debugging for broken Samsung galaxy j6 phone
Hi Anu,
You can use the Mouse along with OTG connector.