Top 10 Battlefield 6 Cheats That Work (And Won’t Get You Banned)
List of 10 powerful Battlefield 6 tips that feel like cheats but are 100% in-game. From minimap tricks to movement secrets — no bans, no malware.
Let’s be honest. When you search cheats for Battlefield 6 game, you’re probably not looking to download sketchy software. You’re frustrated. You keep dying. Your K/D looks rough. And you just want to know what the top players are doing that you aren’t.
And we get it; we’re here to help.
In this guide, we cover the real stuff — the hidden mechanics, secret settings, and tactical tricks that feel like cheating but are 100% built into the game. No bans. No malware. And no shady downloads. Just smarter play.
So, let’s get into it.
First, Let’s Talk About the Actual “Cheating” Problem
Before we get to the good stuff, we need to say this clearly.
Yes, third-party cheat programs exist for Battlefield 6. Aimbots, wallhacks, ESP tools, recoil scripts — they’re all out there on shady corners of the internet. Floral Loft SAC’s coverage of BF6 cheating puts it plainly: ban rates are extremely high.
EA’s anti-cheat system — significantly upgraded compared to the disaster that was Battlefield 2042 — detects most of these tools within hours, sometimes days.
Once catched, account bans are permanent. There’s no reliable appeals process. And here’s the part those cheat-selling websites won’t tell you: a huge chunk of these downloads contain actual malware.
You’re not just risking your game account, you’re risking your entire PC too!
Even if the cheat somehow worked, your stats get wiped when detected. And given how aggressive EA’s current enforcement is, the math just doesn’t work in your favor.
So we’re leaving all of that aside. What we are going to cover is something better — the in-game mechanics and settings that are so powerful, they genuinely feel like cheating.
Also read:
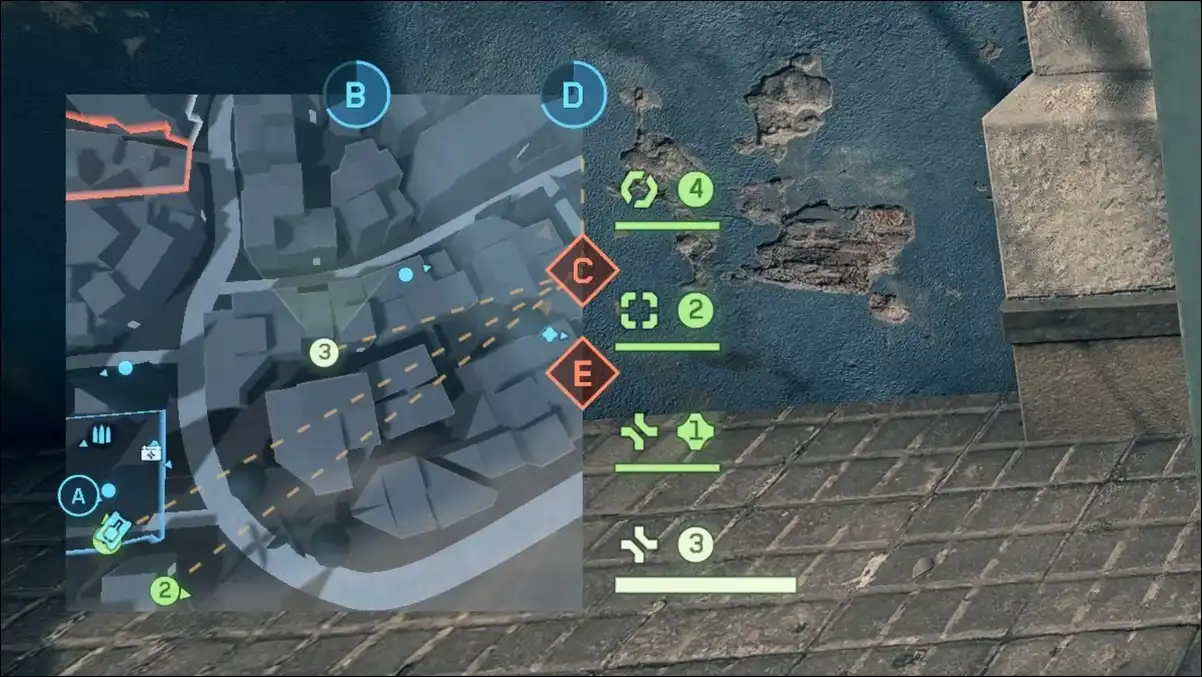
#1. Use the Minimap Like a Built-In Wallhack
This is the most powerful free tool in the game. Almost nobody uses it properly.
Here’s how it works.
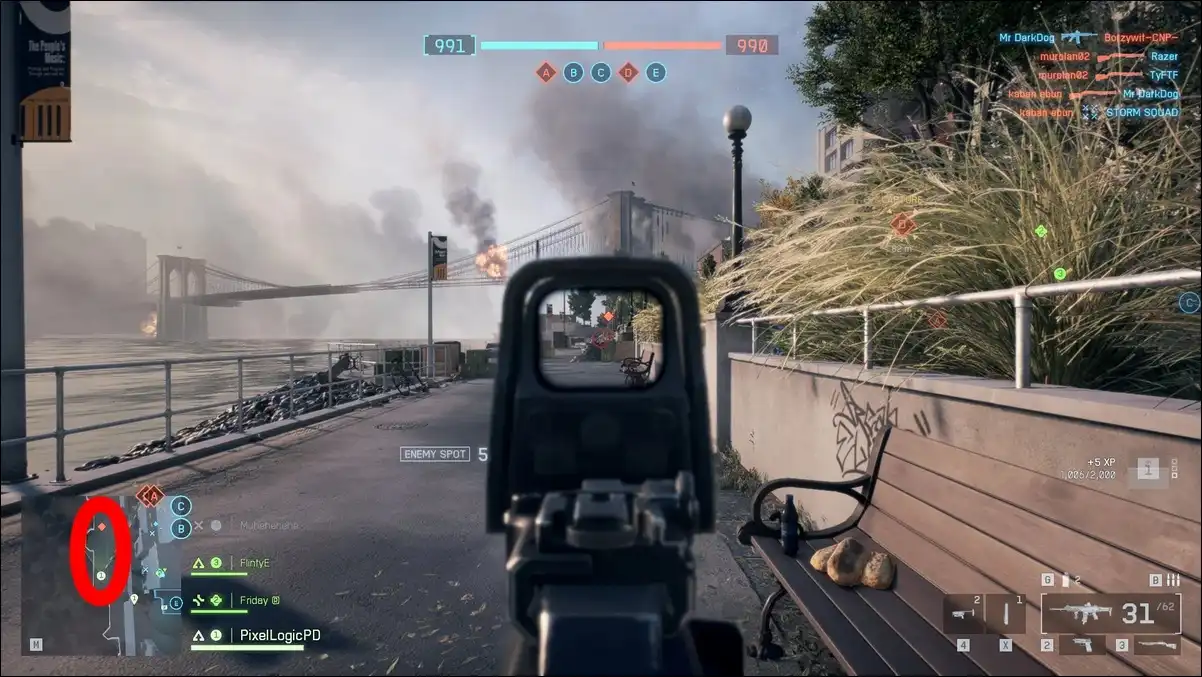
In BF6’s current build, any enemy who fires an unsuppressed weapon appears on your minimap the instant they shoot. It functions like a built-in wallhack for attentive players.
So when you’re holding an objective and the minimap suddenly shows a flicker near the building to your left — that’s an enemy.
You already know where they are before they push.
The trick is training yourself to split attention between your crosshair and the minimap. It sounds simple. It isn’t, until it becomes habit. Once it does, you’ll wonder how you ever played without it.
Further, layer this with audio. BF6 deliberately makes enemy footsteps louder and sharper than friendly ones.
So, you can easily track enemy movement through walls and between floors just by listening. Combine minimap pings with footstep audio and you have two independent intelligence streams running at all times.
This single change — minimap awareness — will improve your gameplay more than almost anything else on this list.
#2. The Out-of-Bounds Timer Trick Nobody Talks About
When you step outside the map’s playable boundary, a 10-second countdown starts. Every single player we’ve watched — new or experienced — immediately sprints back the moment it triggers.
You know what? Don’t do that, and here’s why!
Most players completely miss: ten seconds is a significant amount of time.
Depending on your position, you can sprint or drive through the out-of-bounds corridor and come out on the completely opposite side of the combat zone — behind enemy lines, from an angle nobody expects.
This works especially well in Conquest near map edges that border objective clusters. You enter the out-of-bounds zone on one side, move along the perimeter, and emerge at the rear of an objective the enemy team is defending.
They’re watching the front. You’re already behind them.
Planning is everything here. You need to know your exit point before you trigger the timer. Sprinting into the void hoping to figure it out mid-countdown is how you die with zero impact.
In a vehicle, this trick becomes even more powerful. You can cover far more ground in 10 seconds on wheels than on foot.
Armored vehicles that would normally be spotted and intercepted approaching from the front can cut through the edge of the map undetected and hit from behind.
It’s unconventional, and feels like exploiting a glitch. But it’s built into the game and fully legal.
So, make use of it.
#3. Weapon Mounting Is the Recoil Fix You’ve Been Ignoring
Weapon mounting is one of the most underrated mechanics in Battlefield 6. Mounting can drastically improve your recoil control and precision, especially during sustained firefights.
Here’s how it works.
When you aim down sights near any wall or solid surface, your weapon automatically mounts. This stabilizes your aim and reduces weapon shake dramatically.
For manual mounting, press F on PC or click the right stick on console. You can mount at any point, not just near cover.
The tactical depth goes deeper than just reduced recoil. Let’s break it down the full mounting system in detail:
- Crouch before mounting to lower your profile — this reduces your exposed hitbox while you hold a position.
- Adjust height by toggling crouch after mounting.
- “Slice the pie” by edging out in small incremental steps rather than exposing your whole body.
Fire in short controlled bursts while mounted. Pre-aim at head level before the enemy comes into your sightline. The moment enemies start focusing your angle, unmount and reposition.
Staying stationary too long makes you a predictable target, even from a strong mounted position.
This technique turns chokepoint defense into something almost unfair.
You’re taking fights on your terms, from cover, with reduced recoil, firing controlled bursts at pre-aimed head height. The only thing the enemy has working for them is raw aim.
You’ve already neutralized everything else.
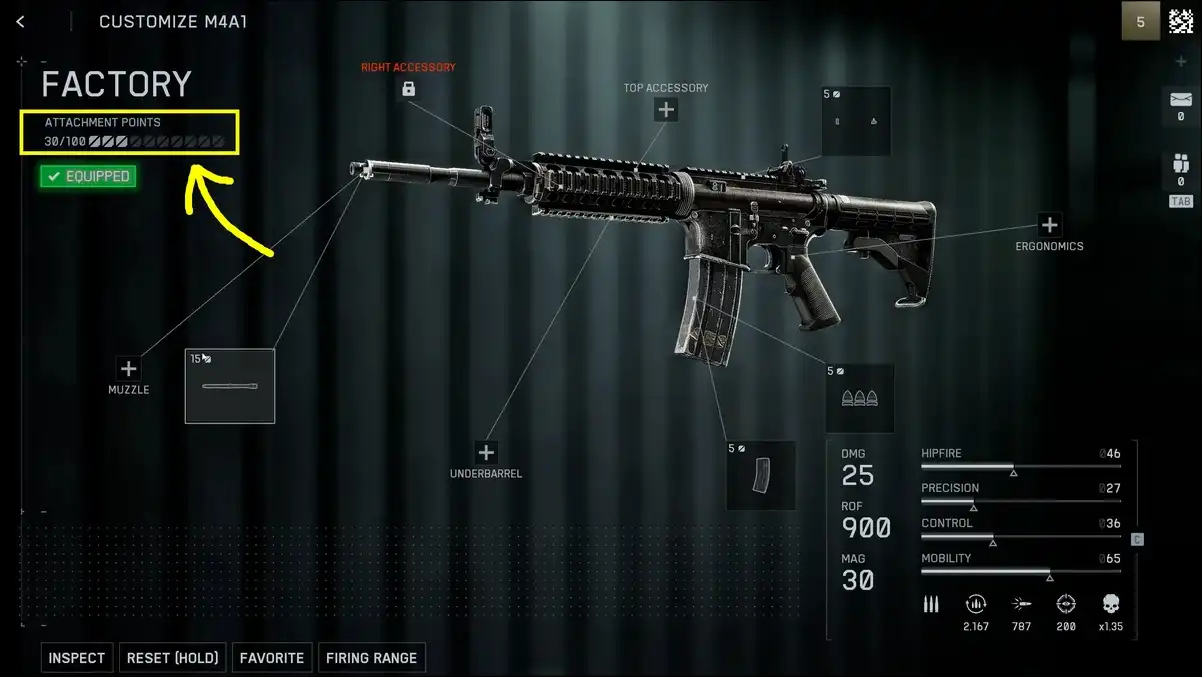
#4. The 100-Point Attachment Budget Is Actually a Mini-Game
Most BF6 players treat weapon customization like a stat check. They pick the “best” attachment for each slot, equip it, and move on. That leaves a massive advantage on the table.
Battlefield 6 gives every weapon 100 attachment points to allocate.
- High-cost attachments — extended magazines, advanced optics, heavy barrels — eat large chunks of the budget but provide strong individual bonuses.
- Low-cost attachments like basic grips, flash hiders, and quick-reload kits take far less of the budget but let you fill more slots with smaller, stacking bonuses.
Keen Gamer’s guide and the BF6 beginner resource at Blazing Boost both highlight this same insight: mixing cheap and expensive attachments intelligently outperforms going all-in on premium gear.
One or two high-cost pieces combined with several low-cost ones creates a more versatile, balanced weapon than stacking every expensive option available.
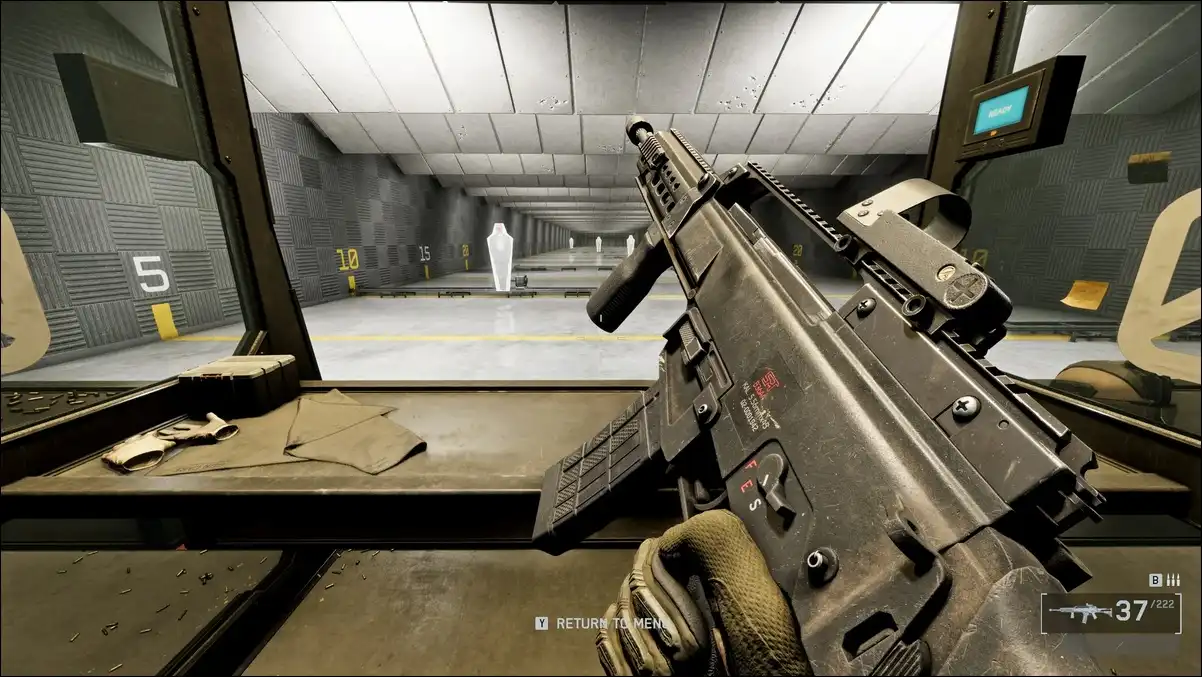
But here’s the real cheat code — the Firing Range.
BF6 has a dedicated firing range you can enter directly from the main menu. No loading screens. No matchmaking queue. You’re just in.
Moreover, you can also jump straight into the firing range from within the weapon customization menu — test a new attachment immediately, feel how it changes recoil and aim speed, and return to the menu with one button press.
Most players skip this completely and find out mid-match that their new build doesn’t work how they expected. Use the range every time you make a significant loadout change.
You’ll build real muscle memory for your specific recoil pattern before you ever take it live.
Also read:
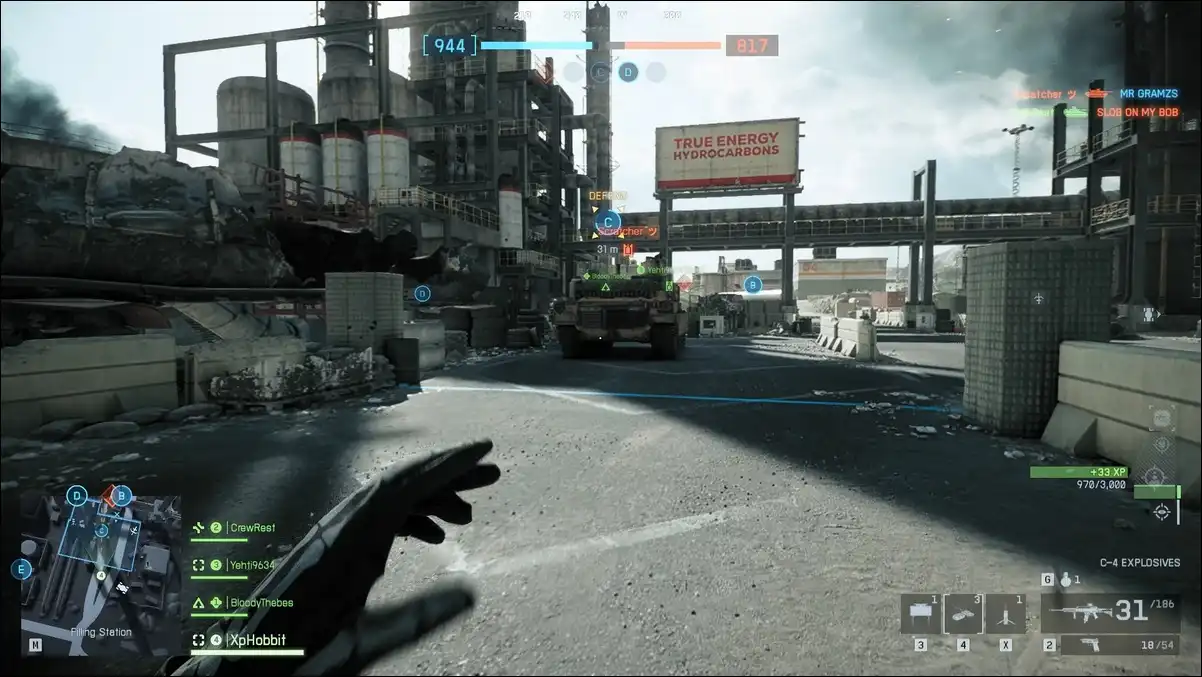
#5. C4 Now Throws Farther — Exploit That Fully
C4 has always been a fan favorite in Battlefield games. But historically, players complained about the throw distance. And getting close enough to use it on vehicles meant exposing yourself dangerously.
Now, BF6 changed that, the C4 feels noticeably lighter in this game — or as they put it, “the soldiers’ arms are much stronger.” You can throw C4 around corners, over obstacles, and from behind cover in situations that simply weren’t possible in older Battlefield titles.
Three well-placed packs destroy any tank in the game at launch. That hasn’t changed from the series tradition. What has changed is how safely you can place them.
Instead of using C4 reactively in the heat of a vehicle fight, think in terms of pre-placement. Lay packs at known vehicle chokepoints before the tank arrives.
Set them at objective doorways and detonate when multiple enemies cluster. Bank grenades — not just C4, but all throwables — off walls rather than throwing them directly at enemies.
Overall, anticipating movement paths beats reacting to them almost every time.
One more thing worth knowing is to unlock the Demolition Charge (C4) for the Recon class, you need to earn 10,000 score while playing as Recon.
Once unlocked, it’s one of the strongest cross-class gadgets in the game. The Recon positioning advantage combined with C4 access creates a vehicle counter that most teams never see coming.

#6. Movement Chaining Is How Top Players Cross Open Ground
No tactical sprint in BF6. That’s one of the bigger mechanical changes from Battlefield 2042, and most veterans celebrated its removal. The crouch-sprinting from BFV is back instead — and chaining movement states is now the primary way to cover open terrain quickly.
The movement chain that matters most: jump and press crouch in mid-air.
You drop directly into a slide. From the slide, you can aim during the movement, which creates surprise re-engagements enemies don’t anticipate. Slide into prone at the end of the chain to make yourself a tiny, difficult-to-hit target.
Further, diving onto your back throws off enemy aim. Leaning around corners triggers automatically when you aim near solid cover — or you can manually mount for tighter angle control.
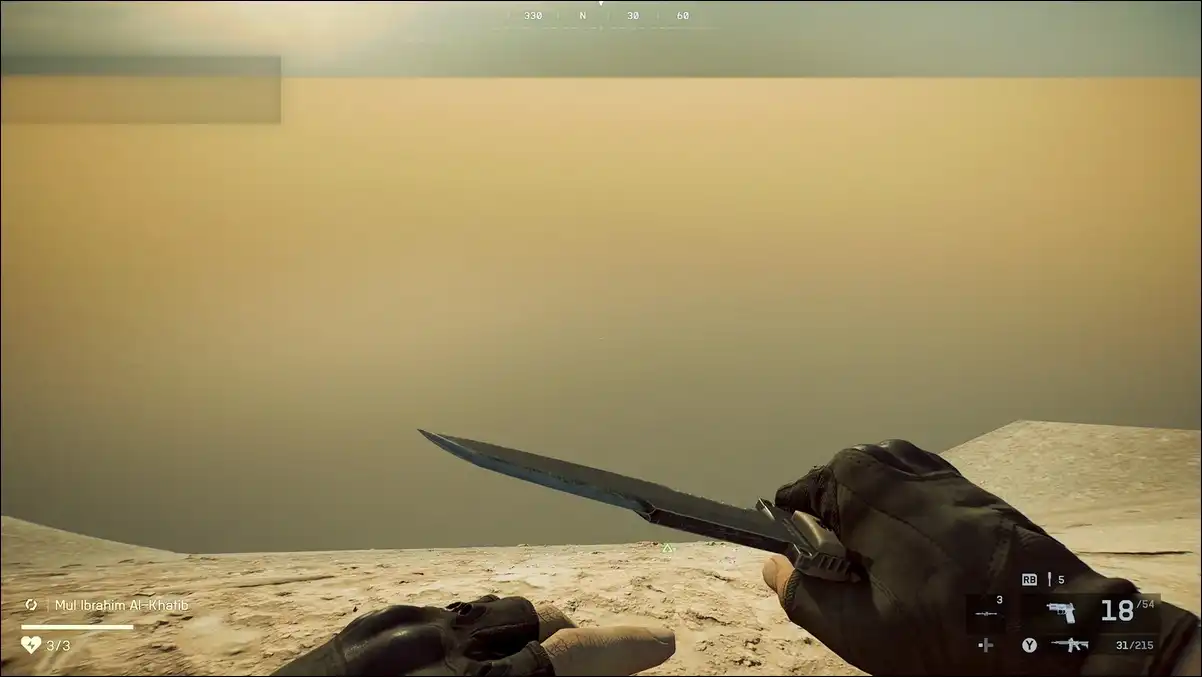
Sprint with your knife drawn for a small but real speed boost when crossing open ground between engagements.
The core philosophy puts best: “movement fluidity, audio awareness, and tactical positioning often matter more than perfect shooting mechanics.”
You can have average aim and still win most engagements by making yourself hard to track.
The players who look like they’re using movement hacks aren’t.
They’ve just internalized these chains until they’re reflexive. Give it a few hours of deliberate practice and you’ll understand why.
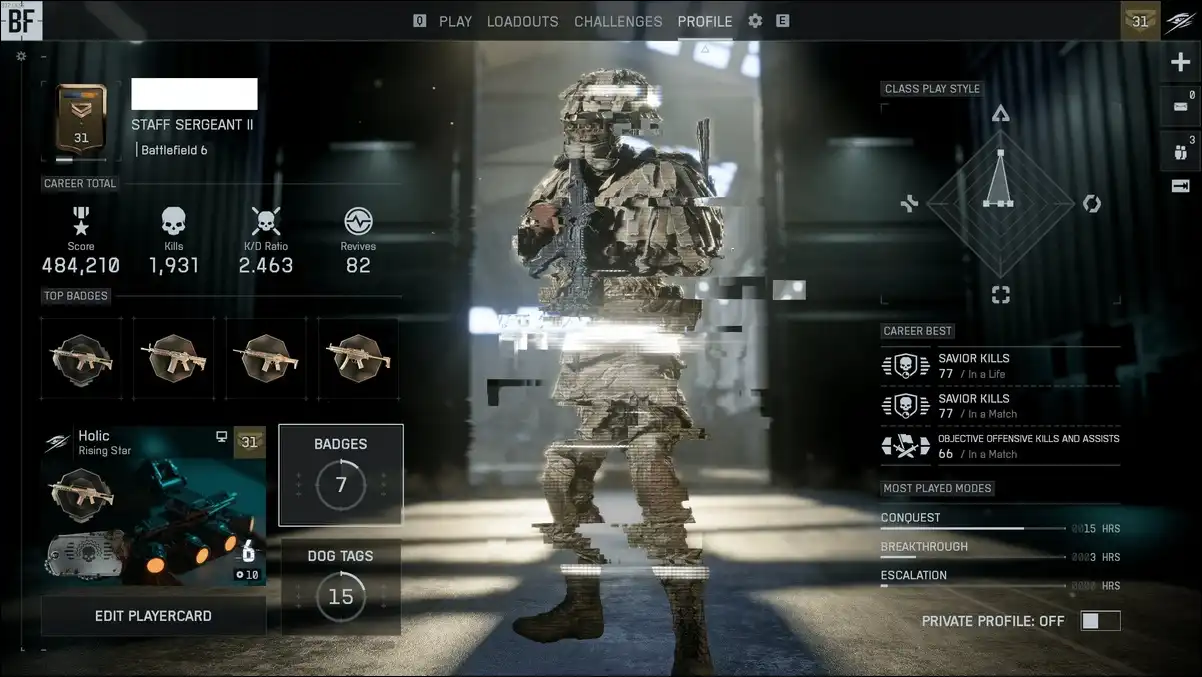
#7. Class Field Specs — Level Up Mid-Match and Actually Use Your Active
Battlefield 6 introduced a match-based class progression system called Field Specs.
Play your class long enough in a single match and it levels up, granting passive perks as you go, like faster reloads, stronger gadgets, better spotting ranges.
At peak match level, you unlock a unique active ability too!
Like, assault gets the Adrenaline Injector for enhanced rush speed. Engineer gets motion sensor mines for area denial. Support gets deployable cover. Recon gets advanced spotting tools.
But, here’s the problem we keep seeing. Players grind out the Field Spec levels mid-match but then never actually trigger the active when it matters.
They forget it’s available. The active ability gets saved for a “perfect moment” that never comes, and the match ends without it being used once.
So, build the habit now. Know exactly when your class active is most valuable:
- For Assault, that’s right before a push through a defended chokepoint.
- For Engineer, it’s setting mines on vehicle access routes before a major armor push.
- For Support, it’s dropping deployable cover at an objective your squad is contesting.
Don’t save it. Use it at the first real opportunity.
There’s also a passive Assault trick worth knowing: going prone when you’re out of combat speeds up squad respawn timers at your position.
This isn’t flashy. But keeping your squad spawning close to objectives quietly wins rounds.
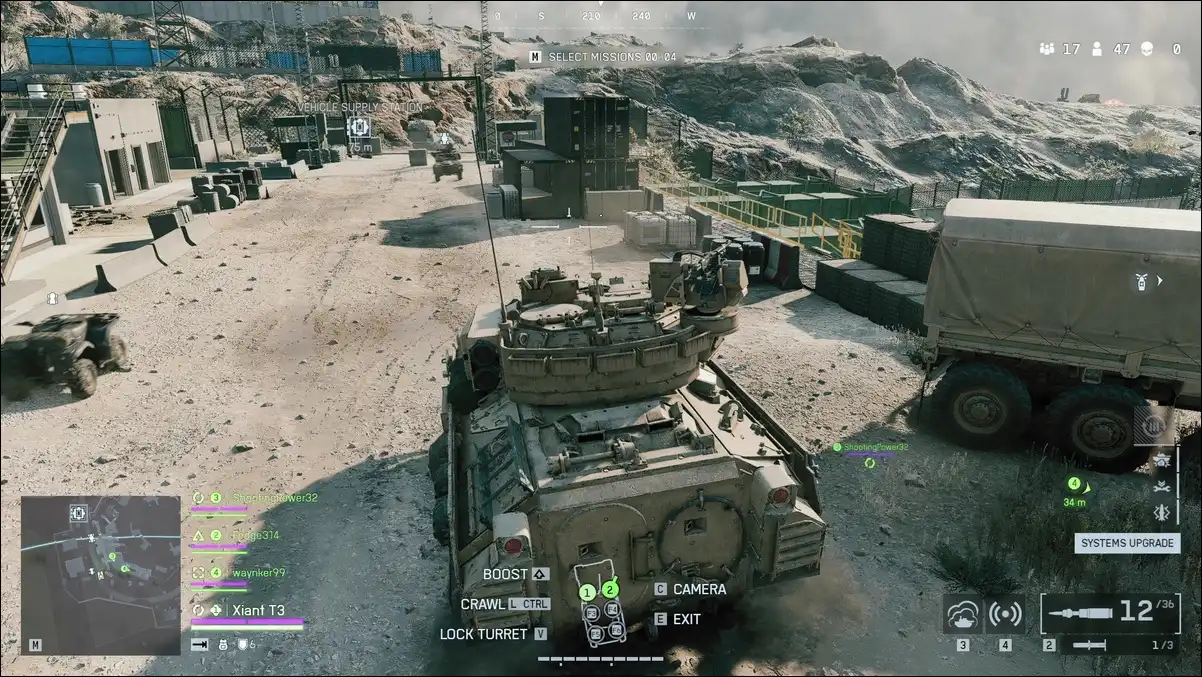
#8. Tank Survival Comes Down to One View-Switching Habit
Driving a tank in BF6 is a completely different skill set from infantry play. And most players who jump in a tank for the first time die to things that had nothing to do with enemy armor.
The most important habit is view-switching. Drive in third-person, and shoot in first-person. Basically, third-person view gives you enough peripheral FOV to spot sneaky Recon players approaching from the sides or rear with C4.
Whereas, first-person gives you the precision aim needed to land shots at range.
To add the tactical layer; ground vehicles are weakest at their sides, rear, top, and bottom. If you’re hunting enemy vehicles as infantry, you already know this — flank rather than engaging frontally, and focus Engineers and Recons on the weak spots.
EA’s official new player guide puts it directly: “a tank is more powerful than a soldier in a barrel-to-barrel gunfight.” But it’s vulnerable the moment it’s flanked or caught in the open by coordinated infantry.
Stay near cover when possible. On maps with jets and helicopters, stay near tall buildings so aircraft can’t get clean angles on you.
And never, under any circumstances, enter a vehicle without first checking the immediate area for infantry. Game Rant warns this directly: a single enemy with C4 or an RPG will end your vehicle run before it starts.
The tank is a force multiplier when played intelligently. It’s just expensive target practice when played carelessly.
#9. Probably, Your Sensitivity Settings Are Wrong — Here’s the Fix
Aim feels are deeply personal in any shooter. But BF6 has a specific settings structure that most players never fully explore, and it’s causing a lot of unnecessary frustration.
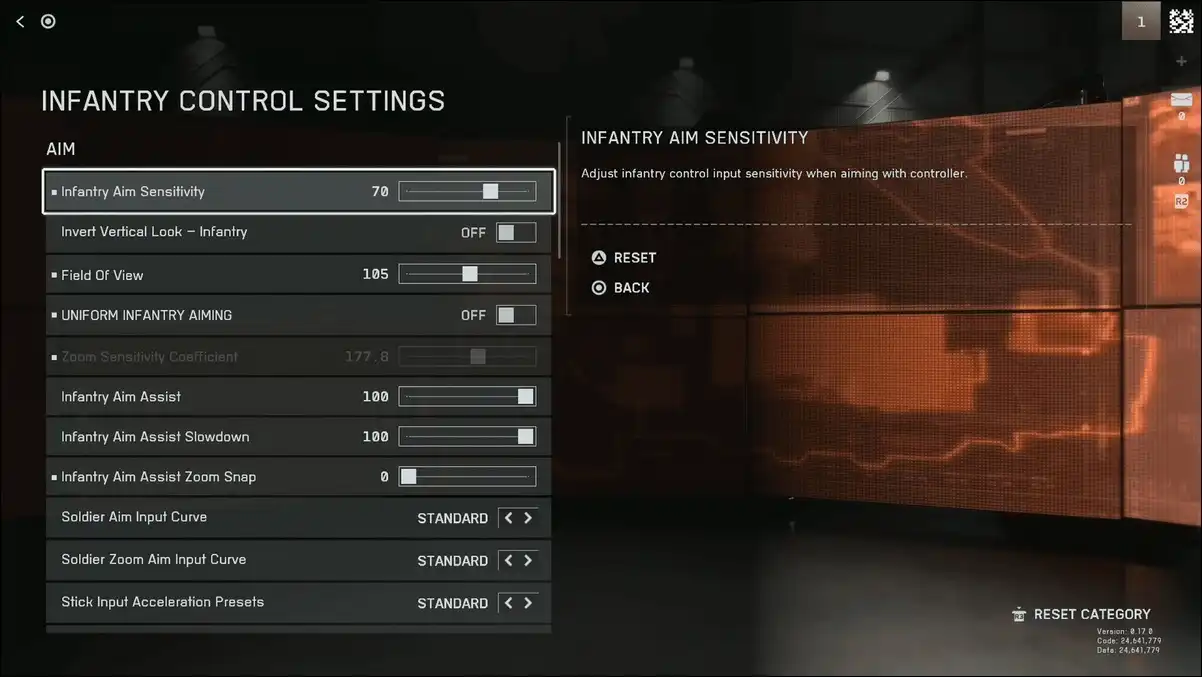
BF6 has separate sensitivity sliders for normal soldier camera movement and ADS (Aim Down Sights). Most players only ever touch the global slider and wonder why their ADS feels disconnected from their hip-fire.
The fix is straightforward. Go to Settings → Mouse & Keyboard → Infantry Control Settings. Set Zoom Sensitivity Coefficient to 0. If your aim still feels inconsistent, turn off Uniform Infantry Aiming as well. These two toggles reset the ADS feel independently of everything else.
From there, default infantry sensitivity is decent, but lowering it by around five points from default noticeably improves shot consistency at medium and long ranges. The improvement is most visible in sustained fire situations where tracking a moving target matters.
Vehicles have their own completely separate control settings section, found just below the infantry section in the same menu. Tune those independently — the aim physics for vehicle weapons are completely different from infantry weapons and warrant their own adjustment.
And use the Firing Range to test any sensitivity change before going live. Don’t find out your new settings feel wrong mid-Conquest match.
Also read:
#10. Q-Spotting Is Free Intel That Most Players Leave on the Table
Manual spotting has existed in Battlefield for years. BF6 players ignore it at a higher rate than any previous entry, possibly because they assume it’s been nerfed or isn’t worth the button press.
It’s worth the button press.
Press Q on PC (L1 or Left Bumper on console) and any enemy in your sightline — infantry or vehicle — gets marked for your entire team on the HUD and minimap for a few seconds. The marker refreshes each time you re-spot.
Thus, you can spot enemies both outside and inside vehicles, and the information shows up for everyone, not just your squad.
Further, double-ping any location on the map to signal to your team that the area is hot with enemies. This is especially useful after you’ve been downed — you can no longer fight, but you can still contribute intelligence.
You can spot the exact player who killed you while lying on the ground waiting for a revive.
Recon players get automatic spotting through their class abilities, but manual Q-spotting works for every class in the game. Coordinated spotting from a full squad effectively gives your entire team a real-time radar overlay for the areas you’re fighting in.
That’s the whole philosophy of this tip, really. Your individual contribution in any given fight is limited. Your intelligence contribution to the whole team is uncapped.
Bonus: The Settings You Should Change Before Your Next Match
We’ve covered the in-game tactics. But there are a few settings that belong in this list because they change your experience immediately.
The audio mix setting is underappreciated. BF6’s default audio is tuned for clarity — you hear footsteps and vehicle sounds well. If you want the more immersive experience, we recommend the War Tapes or War Tapes VAL mix, which makes everything louder and more visceral.
The tradeoff is that footstep audibility can suffer slightly, so this comes down to whether you prioritize immersion or tactical audio. For competitive play, stick with default. For campaign or casual sessions, War Tapes is excellent.
The damage number display, which sits left of your crosshair by default, is also more practical than most players realize. It shows you real-time feedback on how effective your weapon is at current range.
Your gun’s actual performance at various distances without needing to run tests in the firing range.
You can turn it off in Settings → Graphics → Icons & Indicators → Crosshairs & Indicators if it bothers you visually, but we’d recommend keeping it on at least until you have your loadouts dialed in.
End Note
Battlefield 6 is a dense, layered game. And the gap between a struggling player and a confident one is almost never pure aim. It’s awareness. It’s systems knowledge. It’s knowing the minimap is a radar, the mounting system cuts recoil, the attachment budget is a puzzle, and the 10-second timer is a flanking tool.
We’ve pulled everything in this article from sources that actually played the game: EA’s official guidance, GameWatcher, Game Rant, GAM3S.GG, Keen Gamer, Skycoach, Blazing Boost, the Steam Community forums, and GamesRadar.
No speculation. No guesswork. Just verified, tested information from people who’ve been in the trenches.
Pick two or three of these to focus on in your next session. Don’t try to implement all ten at once. Let each one become natural before you add the next.
And if you’re still dying a lot in the early weeks — that’s normal. The Steam Community discussion on new player experience is refreshingly honest about this: any new Battlefield player, especially one new to the franchise, is going to die a lot. It’s how the game teaches you.
Accept it, learn from it, and use these tips to make the learning curve a little less brutal.
See you on the battlefield!
Sources referenced in this article: EA's Official New Player Guide to Battlefield 6 · GameWatcher BF6 Tips, Console Commands and Cheats · Game Rant: Best Tips, Tricks, and Game Settings · GAM3S.GG Beginner Tips Guide · Keen Gamer: 12 Beginner Tips · Skycoach BF6 Beginners Guide · Blazing Boost Beginners Guide · GamesRadar: Ladder Exploit Coverage · Steam Community: BF6 Achievement Guide · Floral Loft SAC: BF6 Cheats What You Need to Know