WordPress Background Images: How to Add, Edit, and Customize
You’re probably here because you’ve just signed up for WordPress hosting and would love to know how to spice up your new WordPress website. Adding a custom background image may just be the perfect way to begin decorating your site and give it a unique look.
There are four methods to add, edit, and customize the background image on a WordPress website. Let’s go through them one by one in this article.
What Are Background Images?
When you install WordPress, it automatically manages different parts of your website, including the appearance. This means you can explore options to edit and customize the background image on your WordPress website.
There are several different types of backgrounds you can use on a WordPress website, as follows:
- Solid colour background – this is the default setting for many WordPress themes. It is excellent to use if a website aims for a simple, neat look.
- Image and patterns – some options allow you to upload a customized background image and create patterns or textures in the Customize menu. This type of background is perfect for giving the site a unique look.
- Moving backgrounds – you can apply videos or GIFs as a website background if you want a more exciting option. However, make sure that it is optimized, so it does not compromise website performance.
The functions.php and header.php file in any WordPress theme are responsible for displaying background images. It can alter background images on a WordPress category page, on the login page, behind a page or a post, and more.
4 Methods to Add, Edit, and Customize Images
You have learned what a WordPress background image is, the types, and the files responsible for displaying it. Now, let’s get started with the methods to add, edit, and customize it right away.
1. Use Your WordPress Theme Settings
This method is the easiest way to change or customize background images on a WordPress website. First, you have to ensure that your current theme allows changing backgrounds. Then, visit the Appearance menu from the WordPress dashboard sidebar.
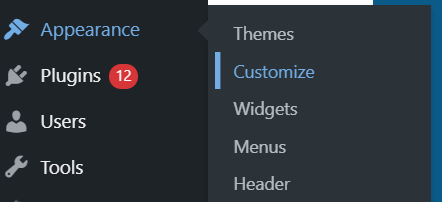
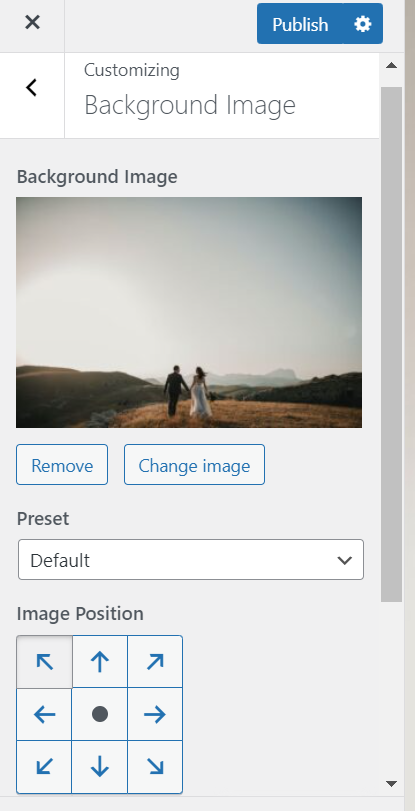
When the menu expands, click Customize, and you will find the Background Image menu. Click Select Image, and choose the desired picture that you have uploaded to the media library. If you’re pleased with the preview, click Publish, and you’re set.
There are several settings you can explore to change how your background image looks. With the Preset option, you can align the image to fit the screen, create a pattern, and more. There is also the Image Position tool to move the picture around and adjust how it looks on the website.
2. Use A Plugin
In case the WordPress theme does not support customizing background images, the simplest way to go is by using a plugin. This eliminates the need to code anything on the website. All you have to do is upload the image from the plugin.
Install Simple Full-Screen Background Image on the website to apply background image customization to all kinds of themes. Then, activate it from the Plugins menu and go to Appearance > Fullscreen BG Image. Click Choose Image and pick one from the media library, select the size and click Insert To Post. A preview of the new background image should appear, and once you feel satisfied, click Save Options to apply it to the website.

The free version of the plugin has several limitations. However, the Pro plan starts from $18 and allows you to have unlimited background images, apply a page-specific background image, and use fade transitions on pages.
3. Use CSS Hero
A hero image allows you to present informational text on top of a visually appealing background. You can also add buttons, headings, and captions on top of it. Hero images are usually added to a website’s homepage as a welcome or a quick introduction.

Use HTML and CSS code to add hero images to a website. Add all the texts and features in the HTML file, then edit the appearance using CSS codes.
Below is the code format you can simply edit according to your needs, then copy paste to the website:
HTML:
<div class=”hero-image”>
<div class=”hero-text”>
<h1>insert title</h1>
<p>insert caption</p>
<button>add buttons</button>
</div>
</div>
CSS:
body, html {
height: 100%;
}
.hero-image {
background-image: linear-gradient(rgba(0, 0, 0, 0.5), rgba(0, 0, 0, 0.5)), url(“imageurl.jpeg”);
height: 50%;
background-position: center;
background-repeat: no-repeat;
background-size: cover;
position: relative;
}
.hero-text {
text-align: center;
position: absolute;
top: 50%;
left: 50%;
transform: translate(-50%, -50%);
color: white;
}
4. Use CSS Code
This method is best to add background images on individual posts or pages. First, visit the specific page you want to apply a background image. Then, right-click and visit the Inspect menu, where you will find the page ID number. Copy it, and save the information for the next step.
After finding page ID number, go to Appearance > Customize from the WordPress dashboard and select the Additional CSS option. In the available box, enter the following code:
body.page-id-@ {
background-image: url(“http://image.jpeg”);
background-position: center center;
background-size: cover;
background-repeat: no-repeat;
background-attachment: fixed;
}
Replace the @ with the page ID number and replace image.jpeg with the real URL of the background image you want to use. Then, click Publish, and the background image should appear in the specified post.
Best Practices for Background Images
While a background image can make your website look more aesthetically pleasing, it may give the opposite effect when not done correctly. There are several factors that you need to pay extra attention to, as follows:
- Use High-Quality Photos – a low-resolution image will become blurry, especially when set to fit the screen. Choosing a high-quality image will prevent this problem.
- Royalty-free Pictures – ensure that the photo you are using for the website is either royalty-free or something you have paid the creator for. This prevents the risk of legal complications later on.
- Photo Optimization – HQ pictures may have large file size and affect loading time. Make sure to use tools to optimize the image, keeping the quality but smaller file size.
Conclusion
All in all, adding a background image to a WordPress website is very simple.
If the theme allows for customized background, then you can find the option in the WordPress settings. If it does not, you can use a plugin to change and edit the background. You can also use CSS codes that help with applying a hero background image or a background image to a specific post. I hope this article helps. If there are any questions, make sure to leave them in the comments section below.